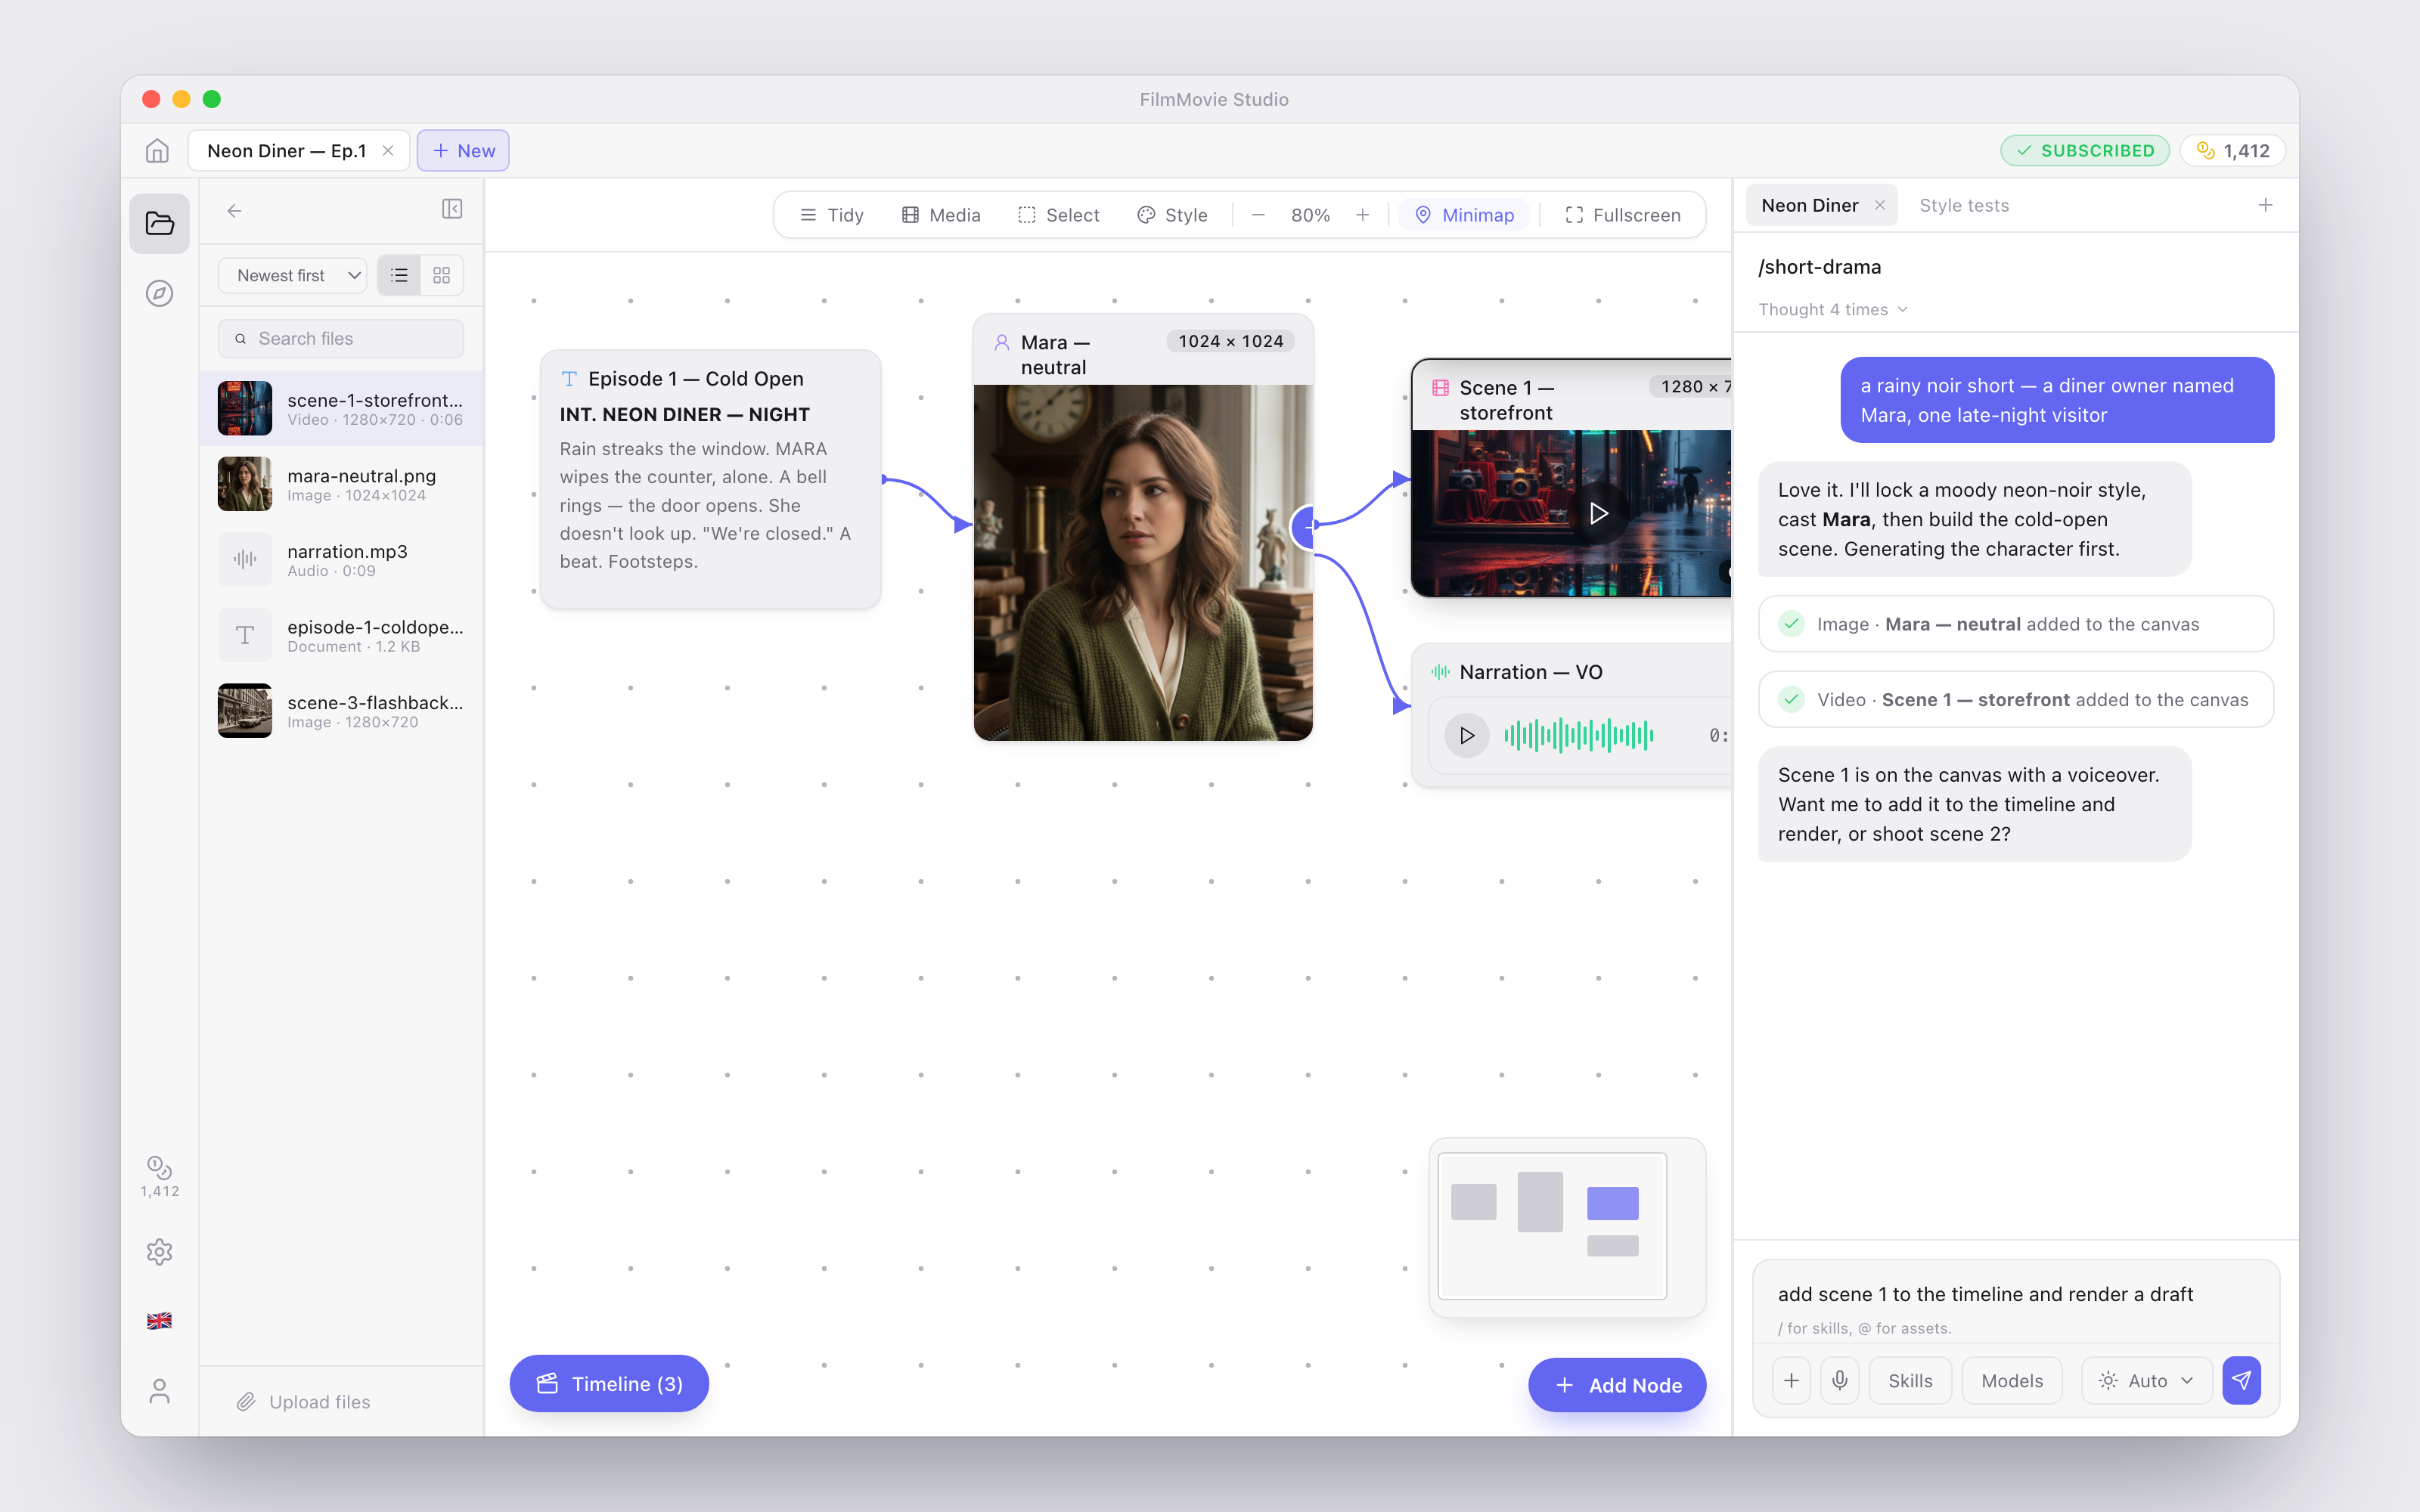
Every project in FilmMovieStudio opens into the same three-part workspace: a file and library panel on the left, an infinite canvas in the middle where your generated media lives as cards, and the chat panel on the right where you talk to the AI. This chapter walks you through each part and shows you how to move around comfortably.
The project tabs bar
Across the very top of the window you'll find the tabs bar — it works just like browser tabs:
- Home — the house icon on the far left takes you back to the launchpad.
- Project tabs — every open project gets its own tab. Click a tab to switch projects; the canvas, timeline, and chat all swap together. Hover a tab and click the × (Close tab) to close it.
- + New — the highlighted chip right after the last tab opens the New Project dialog. Give it a Project name (and an optional Description), click Create project, and the new project opens in a fresh tab.
- On the far right you'll see your SUBSCRIBED badge and live credit balance if you have a subscription. Without one, the balance sits blurred behind the subscribe prompt.
The icon rail
The slim vertical strip on the left edge switches what the left panel shows:
- Files — the folder icon. Shows every file in the current project.
- Hub — Skills & Plugins — the compass icon. Browse and launch Skills and Plugins.
- Assets Library — the bookmark icon. Your cross-project library of saved cards (see Cast & Asset Libraries).
At the bottom of the rail:
- Credits — the coin icon with your balance underneath; click it to open the Subscription section of Settings.
- Settings — the gear icon.
- Language — the flag icon opens the language switcher.
- Account — the user icon jumps to your account settings.
The Files panel
With Files selected, the left panel lists everything the project has produced or imported. You can:
- Search files by name using the search box at the top.
- Sort by Newest first, Oldest first, or Name.
- Switch between List view and Thumbnail view.
- Click Upload files at the bottom to bring in your own images, videos, audio, or documents.
Anything you upload is copied into the project's local assets folder — your media always stays on your computer — and is immediately placed on the canvas as a card, so you can use it as a reference, remix it, or drop it on the timeline. You can also drag a file from the Files panel straight onto the canvas to place it exactly where you want it.
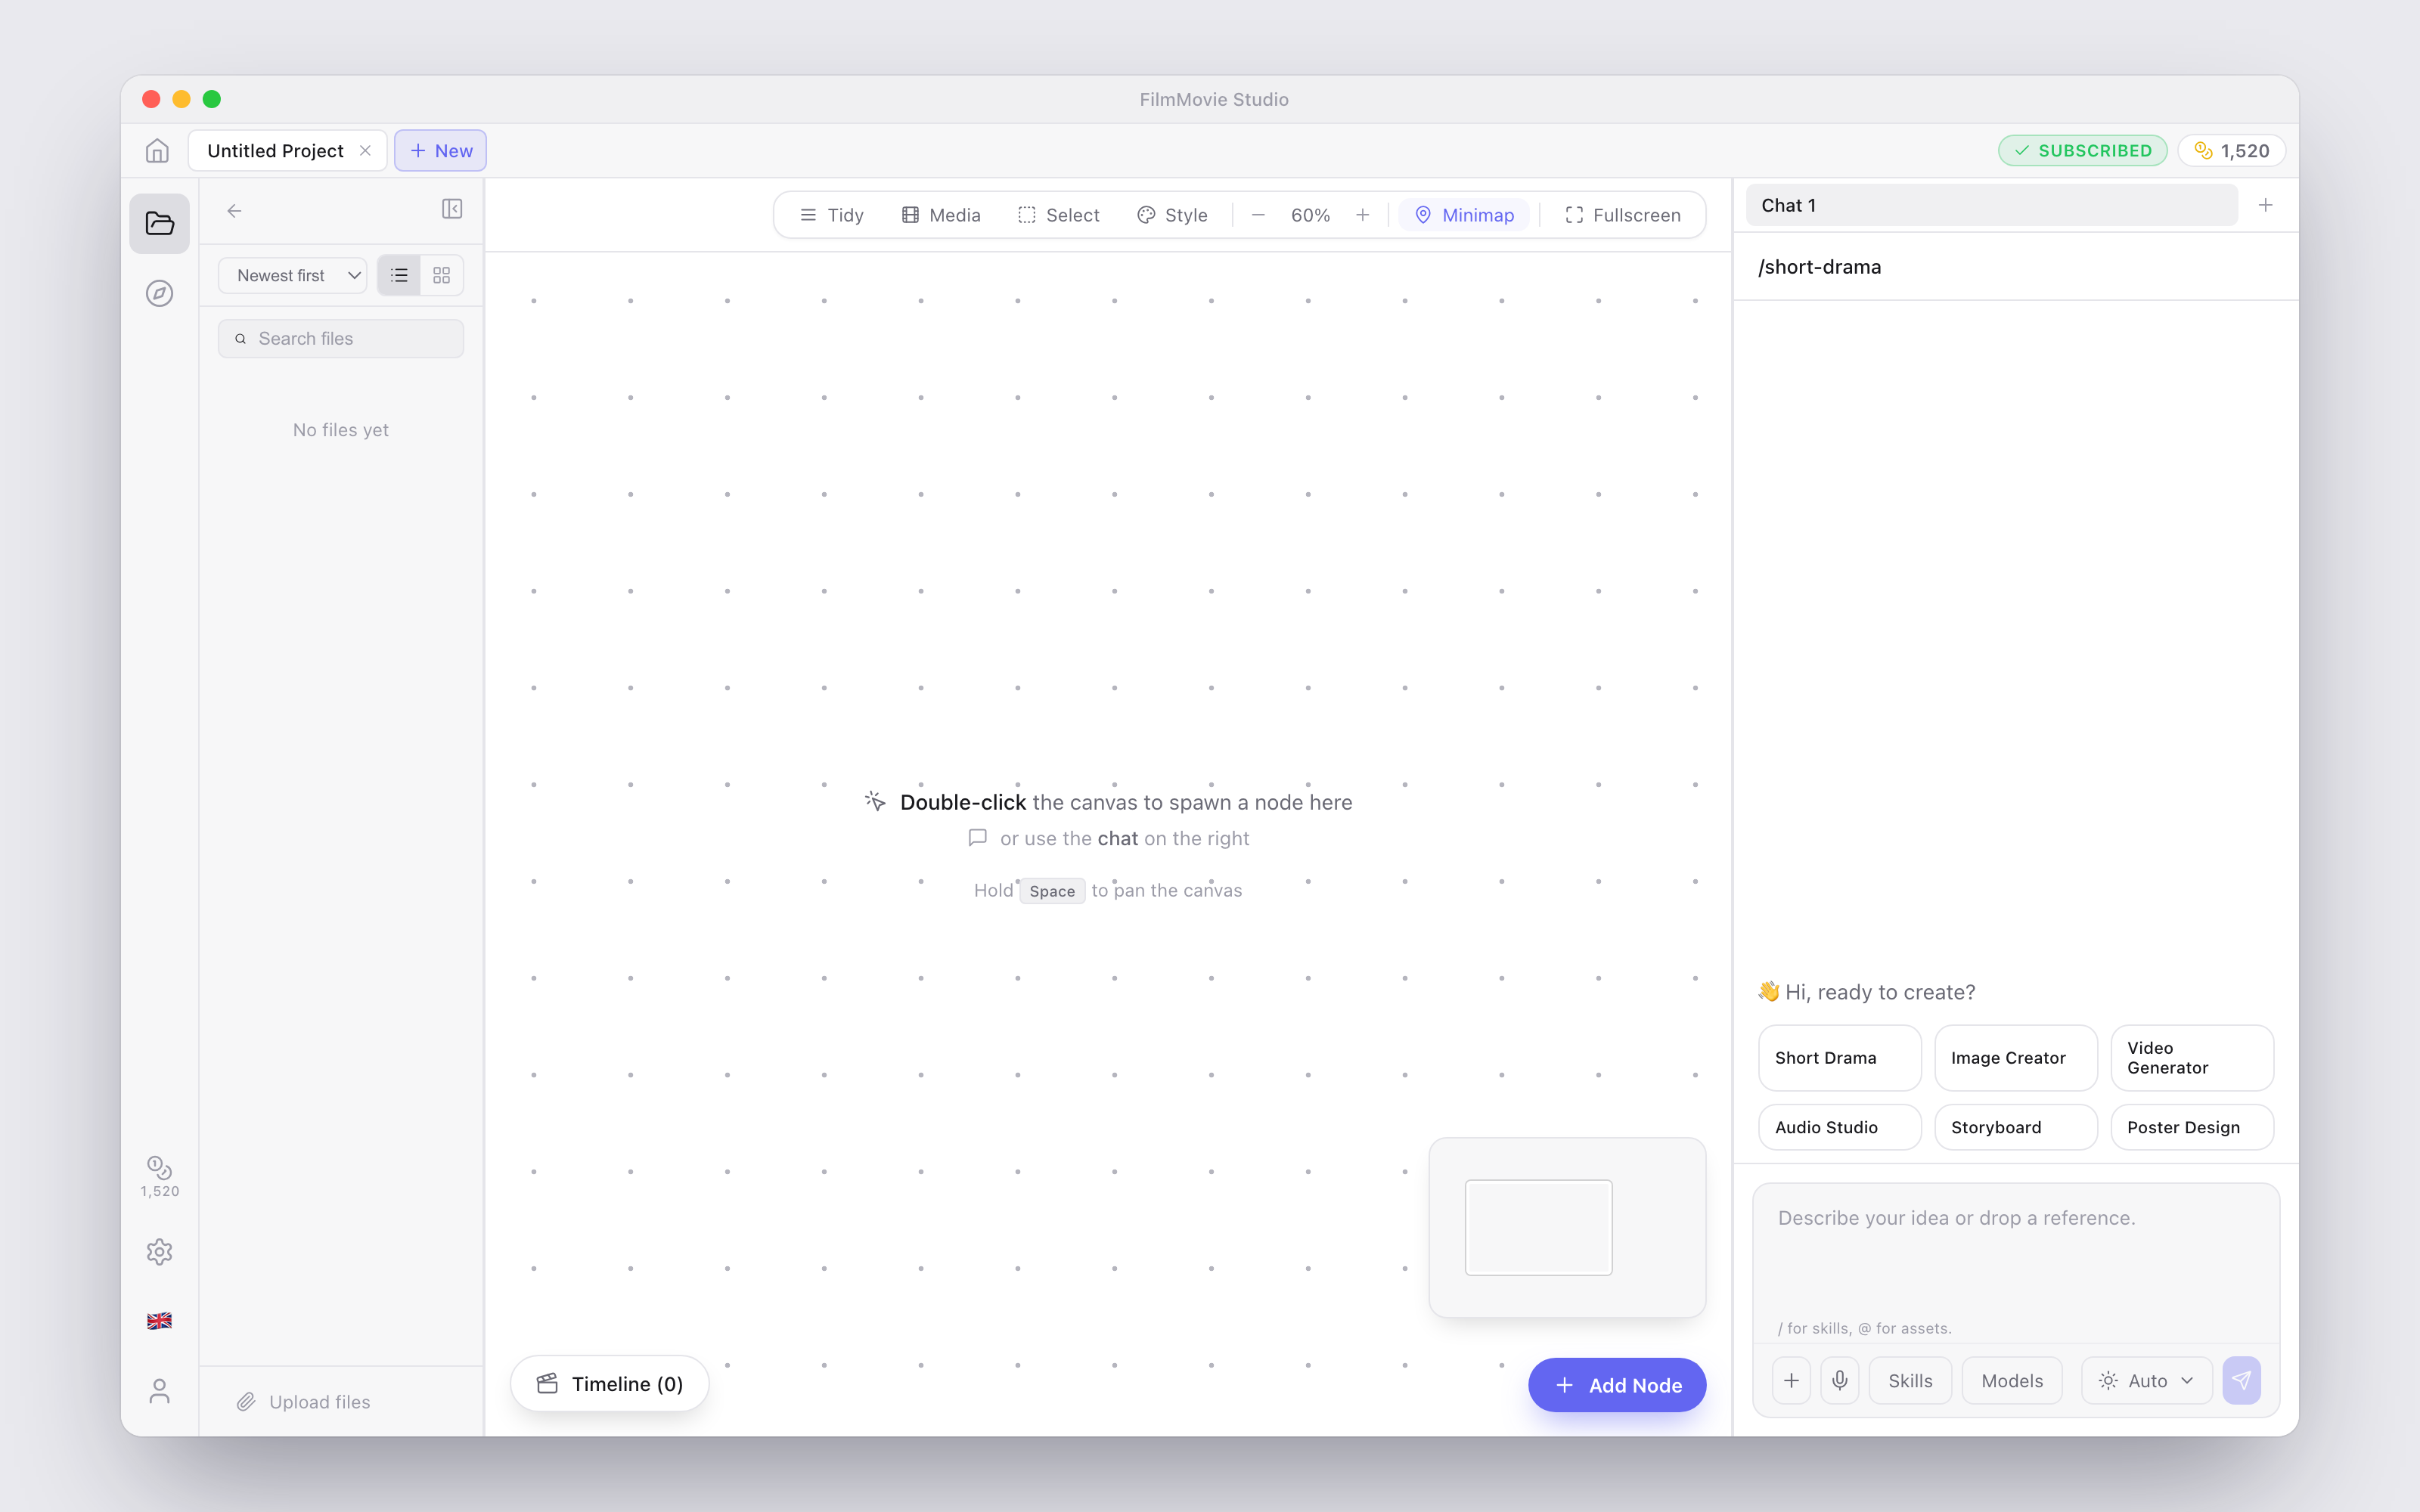
The canvas and the chat panel
The big area in the middle is the canvas — a freeform, infinite surface where every generation lands as a card. The panel on the right is the chat, where you describe what you want and the AI agent builds it card by card. The chat is covered in depth in Chat & the Agent; the cards themselves in Canvas & Cards.
In the bottom-left corner of the canvas sits the Timeline pill (it shows how many clips are on it, e.g. "Timeline (5)") — click it to open the Timeline Editor. In the bottom-right corner, the + Add Node button lets you add a blank card at any time.
Moving around the canvas
Once a project fills up, navigation matters. Here is everything at your fingertips:
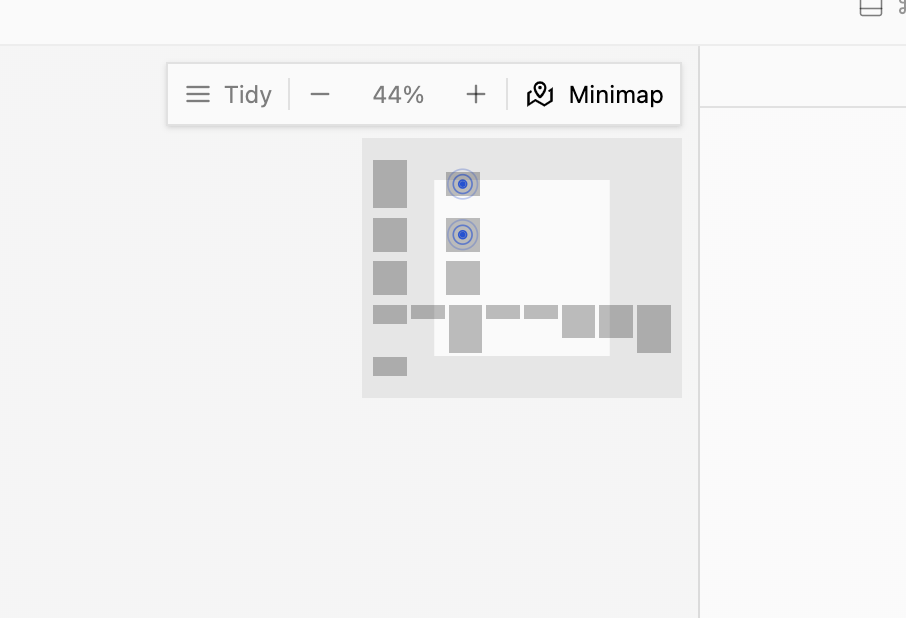
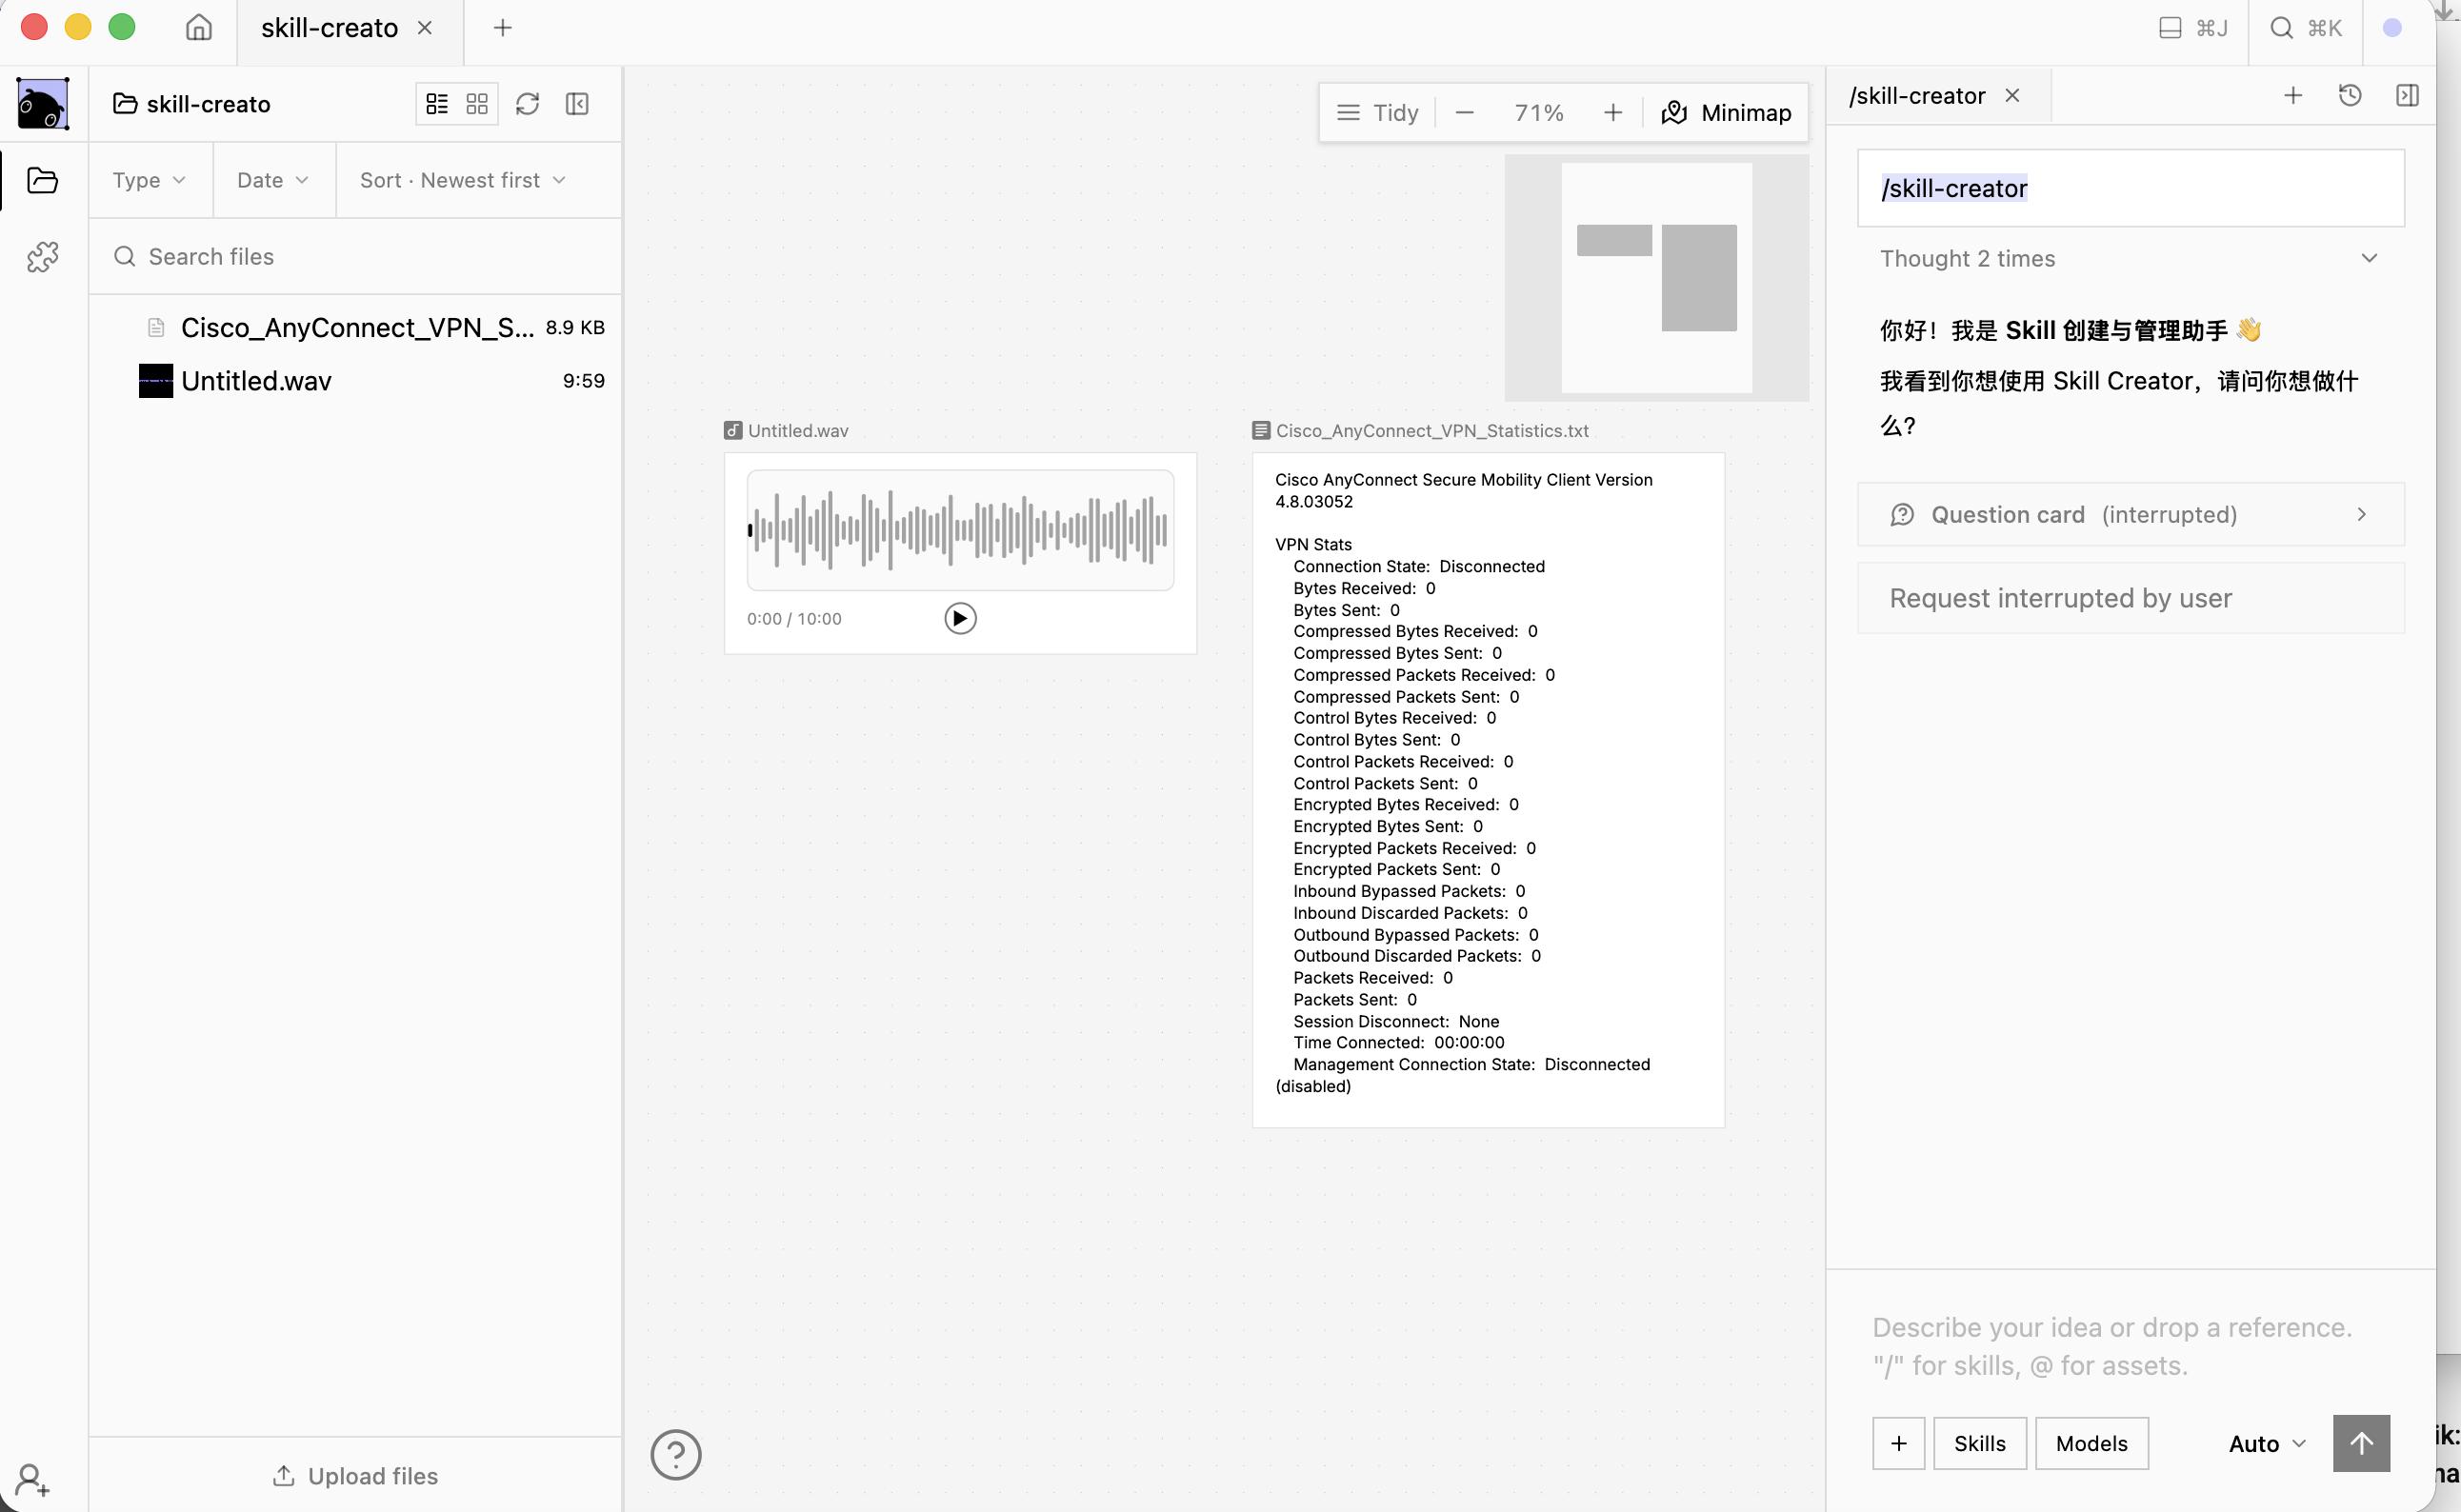
- Zoom with the mouse wheel. Scrolling zooms in and out, centered on your cursor — no modifier key needed. You can also use the − and + buttons in the top-right toolbar, which step the zoom 10% at a time between 5% and 100%. New projects start at 60%.
- Pan by holding Space and dragging. The cursor turns into a grab hand while you drag the canvas around.
- Minimap. The Minimap toggle in the top-right toolbar shows a small overview map in the corner of the canvas. The white rectangle is your current view — click or drag anywhere on the minimap to jump there instantly.
The top-left toolbar holds the canvas tools:
- Tidy — auto-arranges all cards into clean columns. If you don't like the result, press ⌘/Ctrl+Z to undo it.
- Media — hides prompt and text cards so you see only images, videos, and audio. Click again to show everything.
- Select — turns a background drag into a selection box. Drag over several cards to select them all, then use the selection bar to Group them into a colored region, Add all to chat, Add all media to timeline, Align into a row, or Delete all selected. Press Esc to clear the selection and exit Select mode.
- Style — opens the Project Style Lock: a style sentence plus an optional reference image that gets applied to every image and video generation in the project, so all your visuals stay consistent. Pin a reference straight from any image card with its Pin style button.
- Fullscreen — the expand icon hides everything except the canvas. A floating toolbar keeps all the tools available; press Esc or click the fullscreen button again to exit.
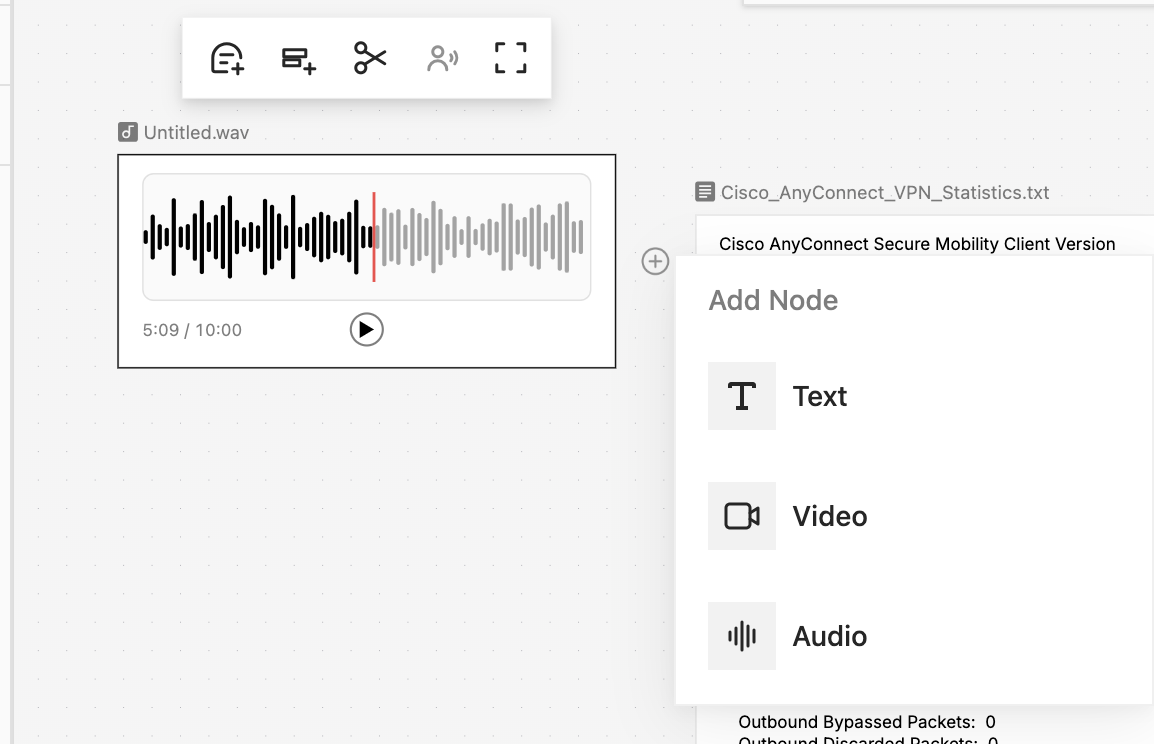
Tip: Double-click any empty spot on the canvas to open the Add Node menu right there — the fastest way to drop a new Text, Table, Image, Video, or Audio card exactly where you want it.
Where to go next
Now that you can find your way around, learn what the cards themselves can do in Canvas & Cards, drive the whole pipeline from Chat & the Agent, or assemble your finished clips in the Timeline Editor.