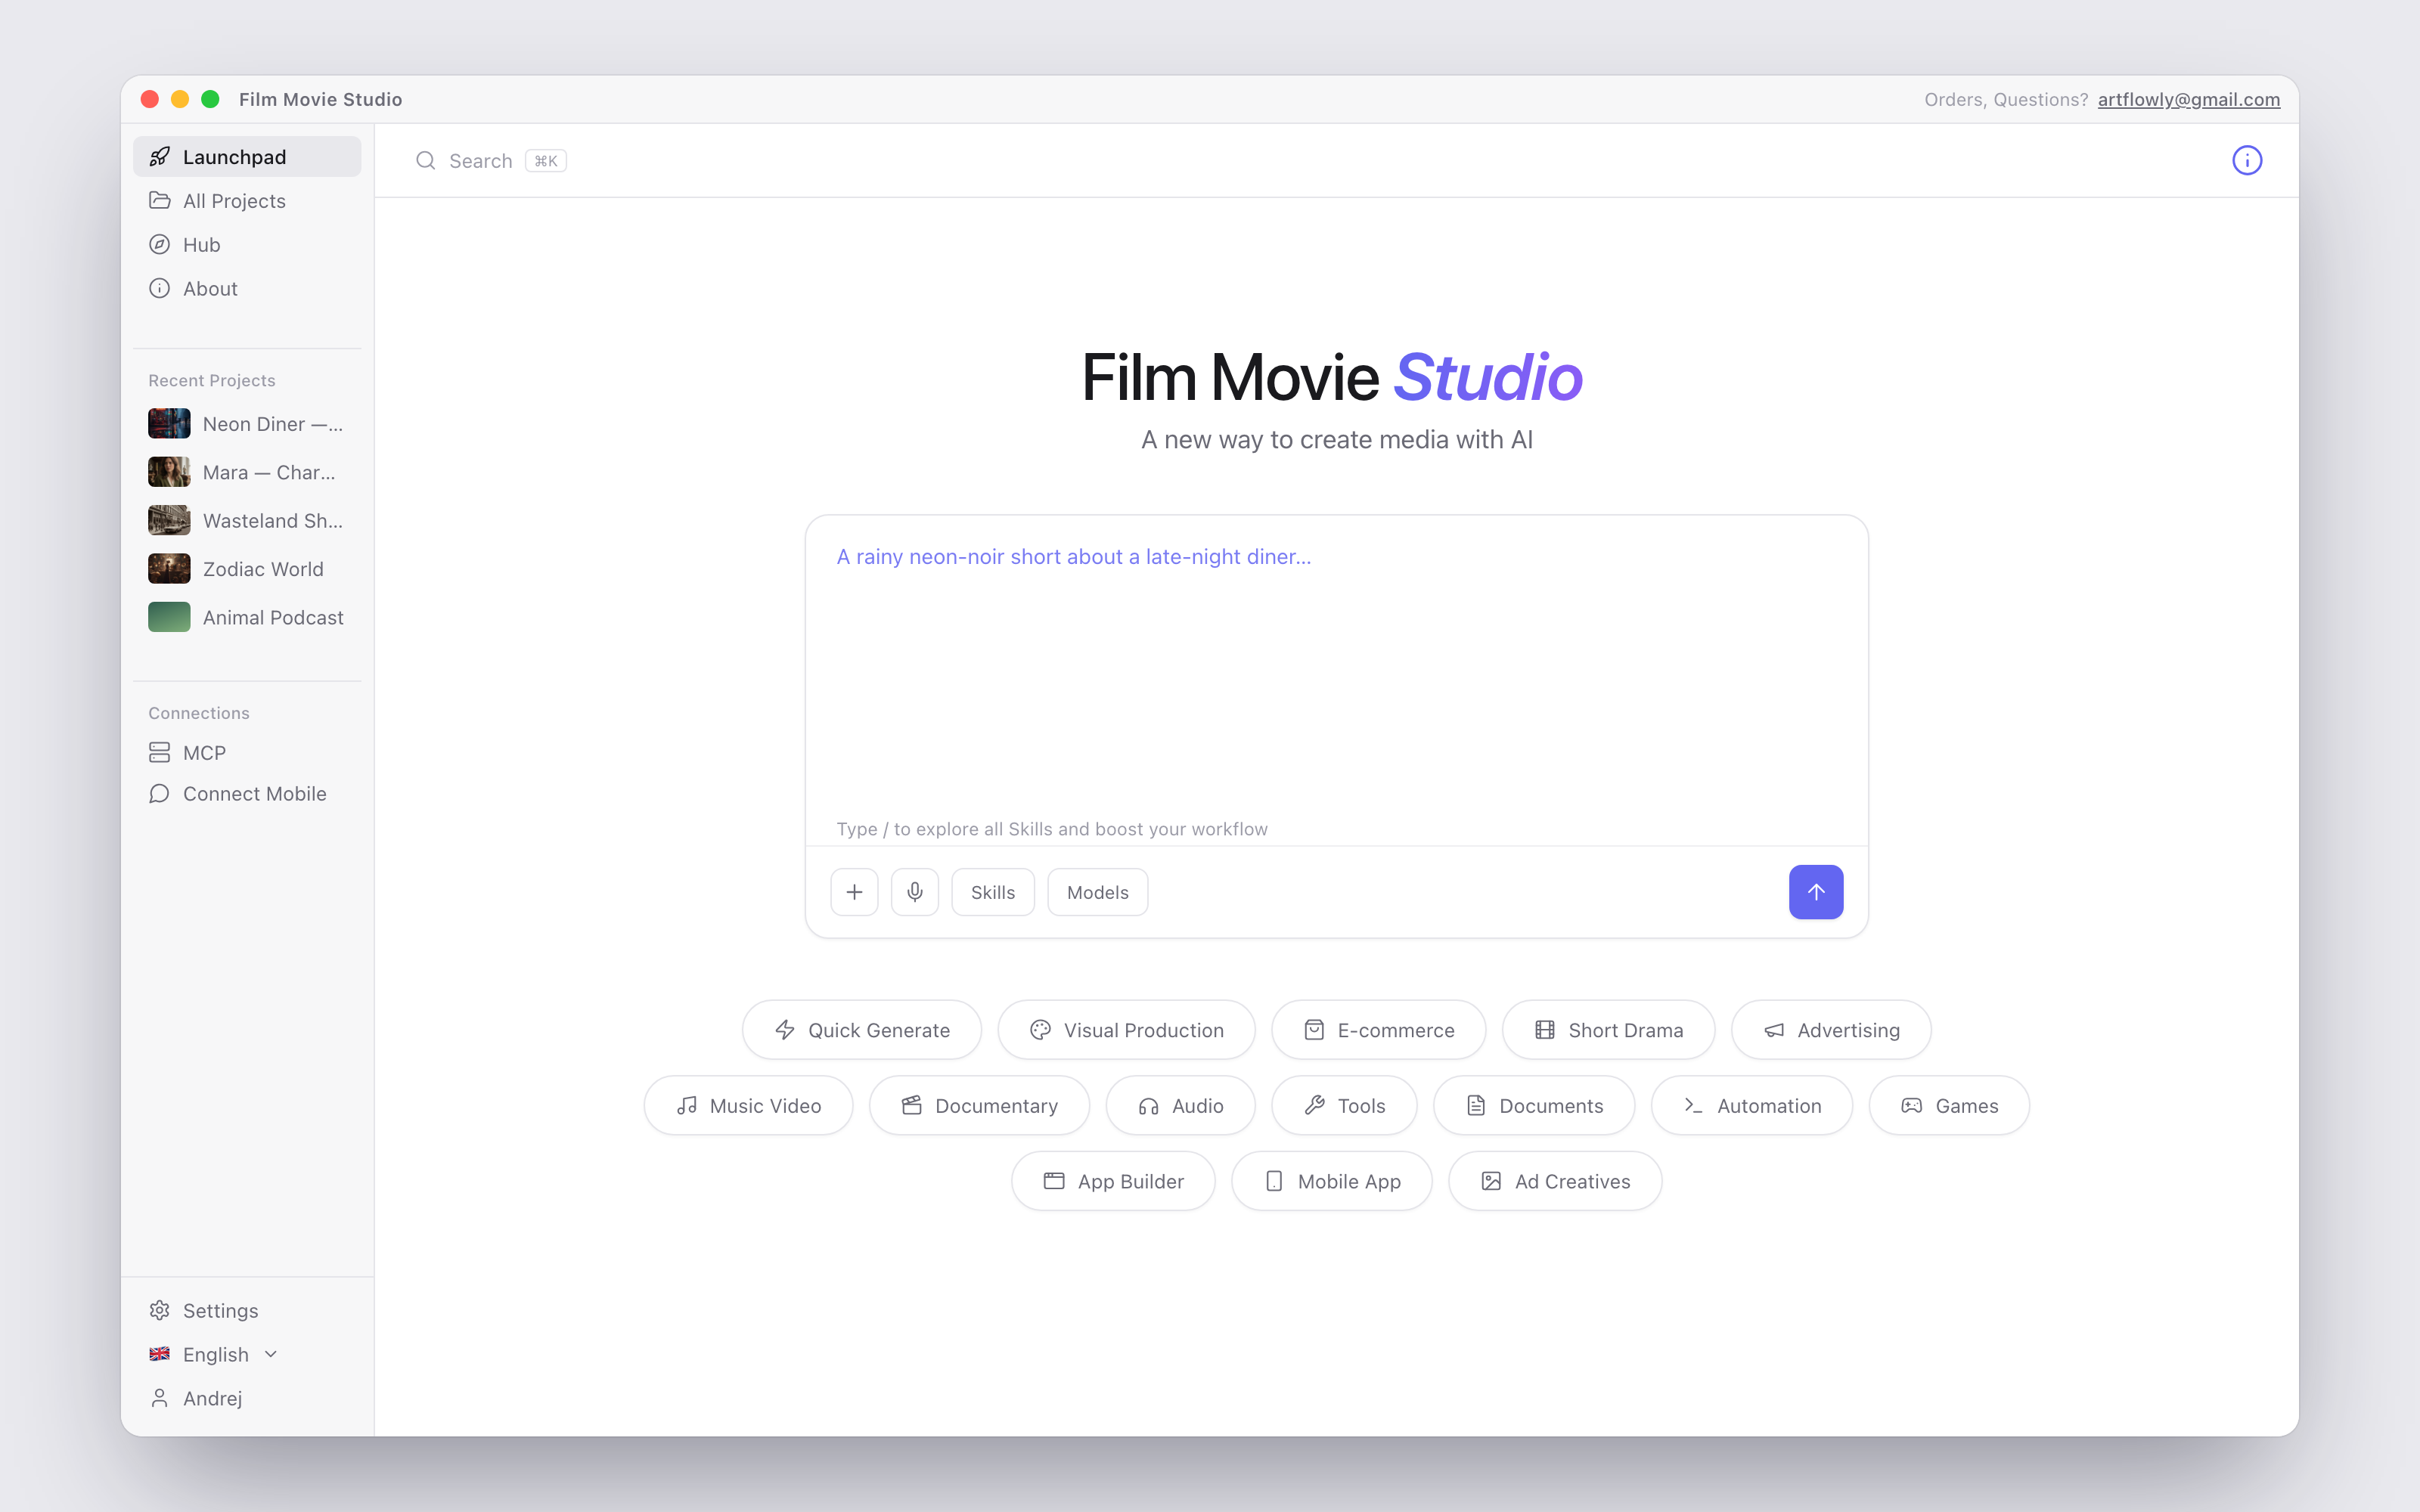
The Launchpad is FilmMovieStudio's home screen — the first thing you see after signing in, and the fastest way to start anything. Type an idea, hit Enter, and a new project opens with the AI already working on it.
The prompt box
The big command bar in the middle is the heart of the Launchpad. Under the headline — "A new way to create media with AI" — it cycles through typed-out example prompts so you can see the breadth of what's possible: /image a red sports car at sunset…, /short-drama a 60-second sci-fi thriller in 6 scenes…, Design 4 logo concepts for a coffee roastery… and more.
Around the box you'll find:
+(Attach file) — attach up to 6 reference files (images, video, audio, PDFs, documents). They travel into the new project so the AI can actually see them.- Microphone — dictate your prompt; the transcription lands in the box.
- Skills — opens the list of enabled skills; picking one inserts its
/command. You can also just type/to browse and filter skills inline. - Models — pick which AI models the agent is allowed to use, per category.
@mentions — type@to reference a saved asset or an attached image by name.- The hint below the box reminds you: "Type / to explore all Skills and boost your workflow."
In the top toolbar, Search (or ⌘K) finds projects, skills, settings and quick links from one place. On the right, hovering the (i) icon shows a popover with your subscription Credits, the app version, and a Guide button that starts an interactive tour of the Launchpad.
Preset categories
Below the prompt box sits a row of category pills. Click one to reveal a "Try these" panel of ready-made preset prompts; click a preset to load it into the box, edit it if you like, and send.
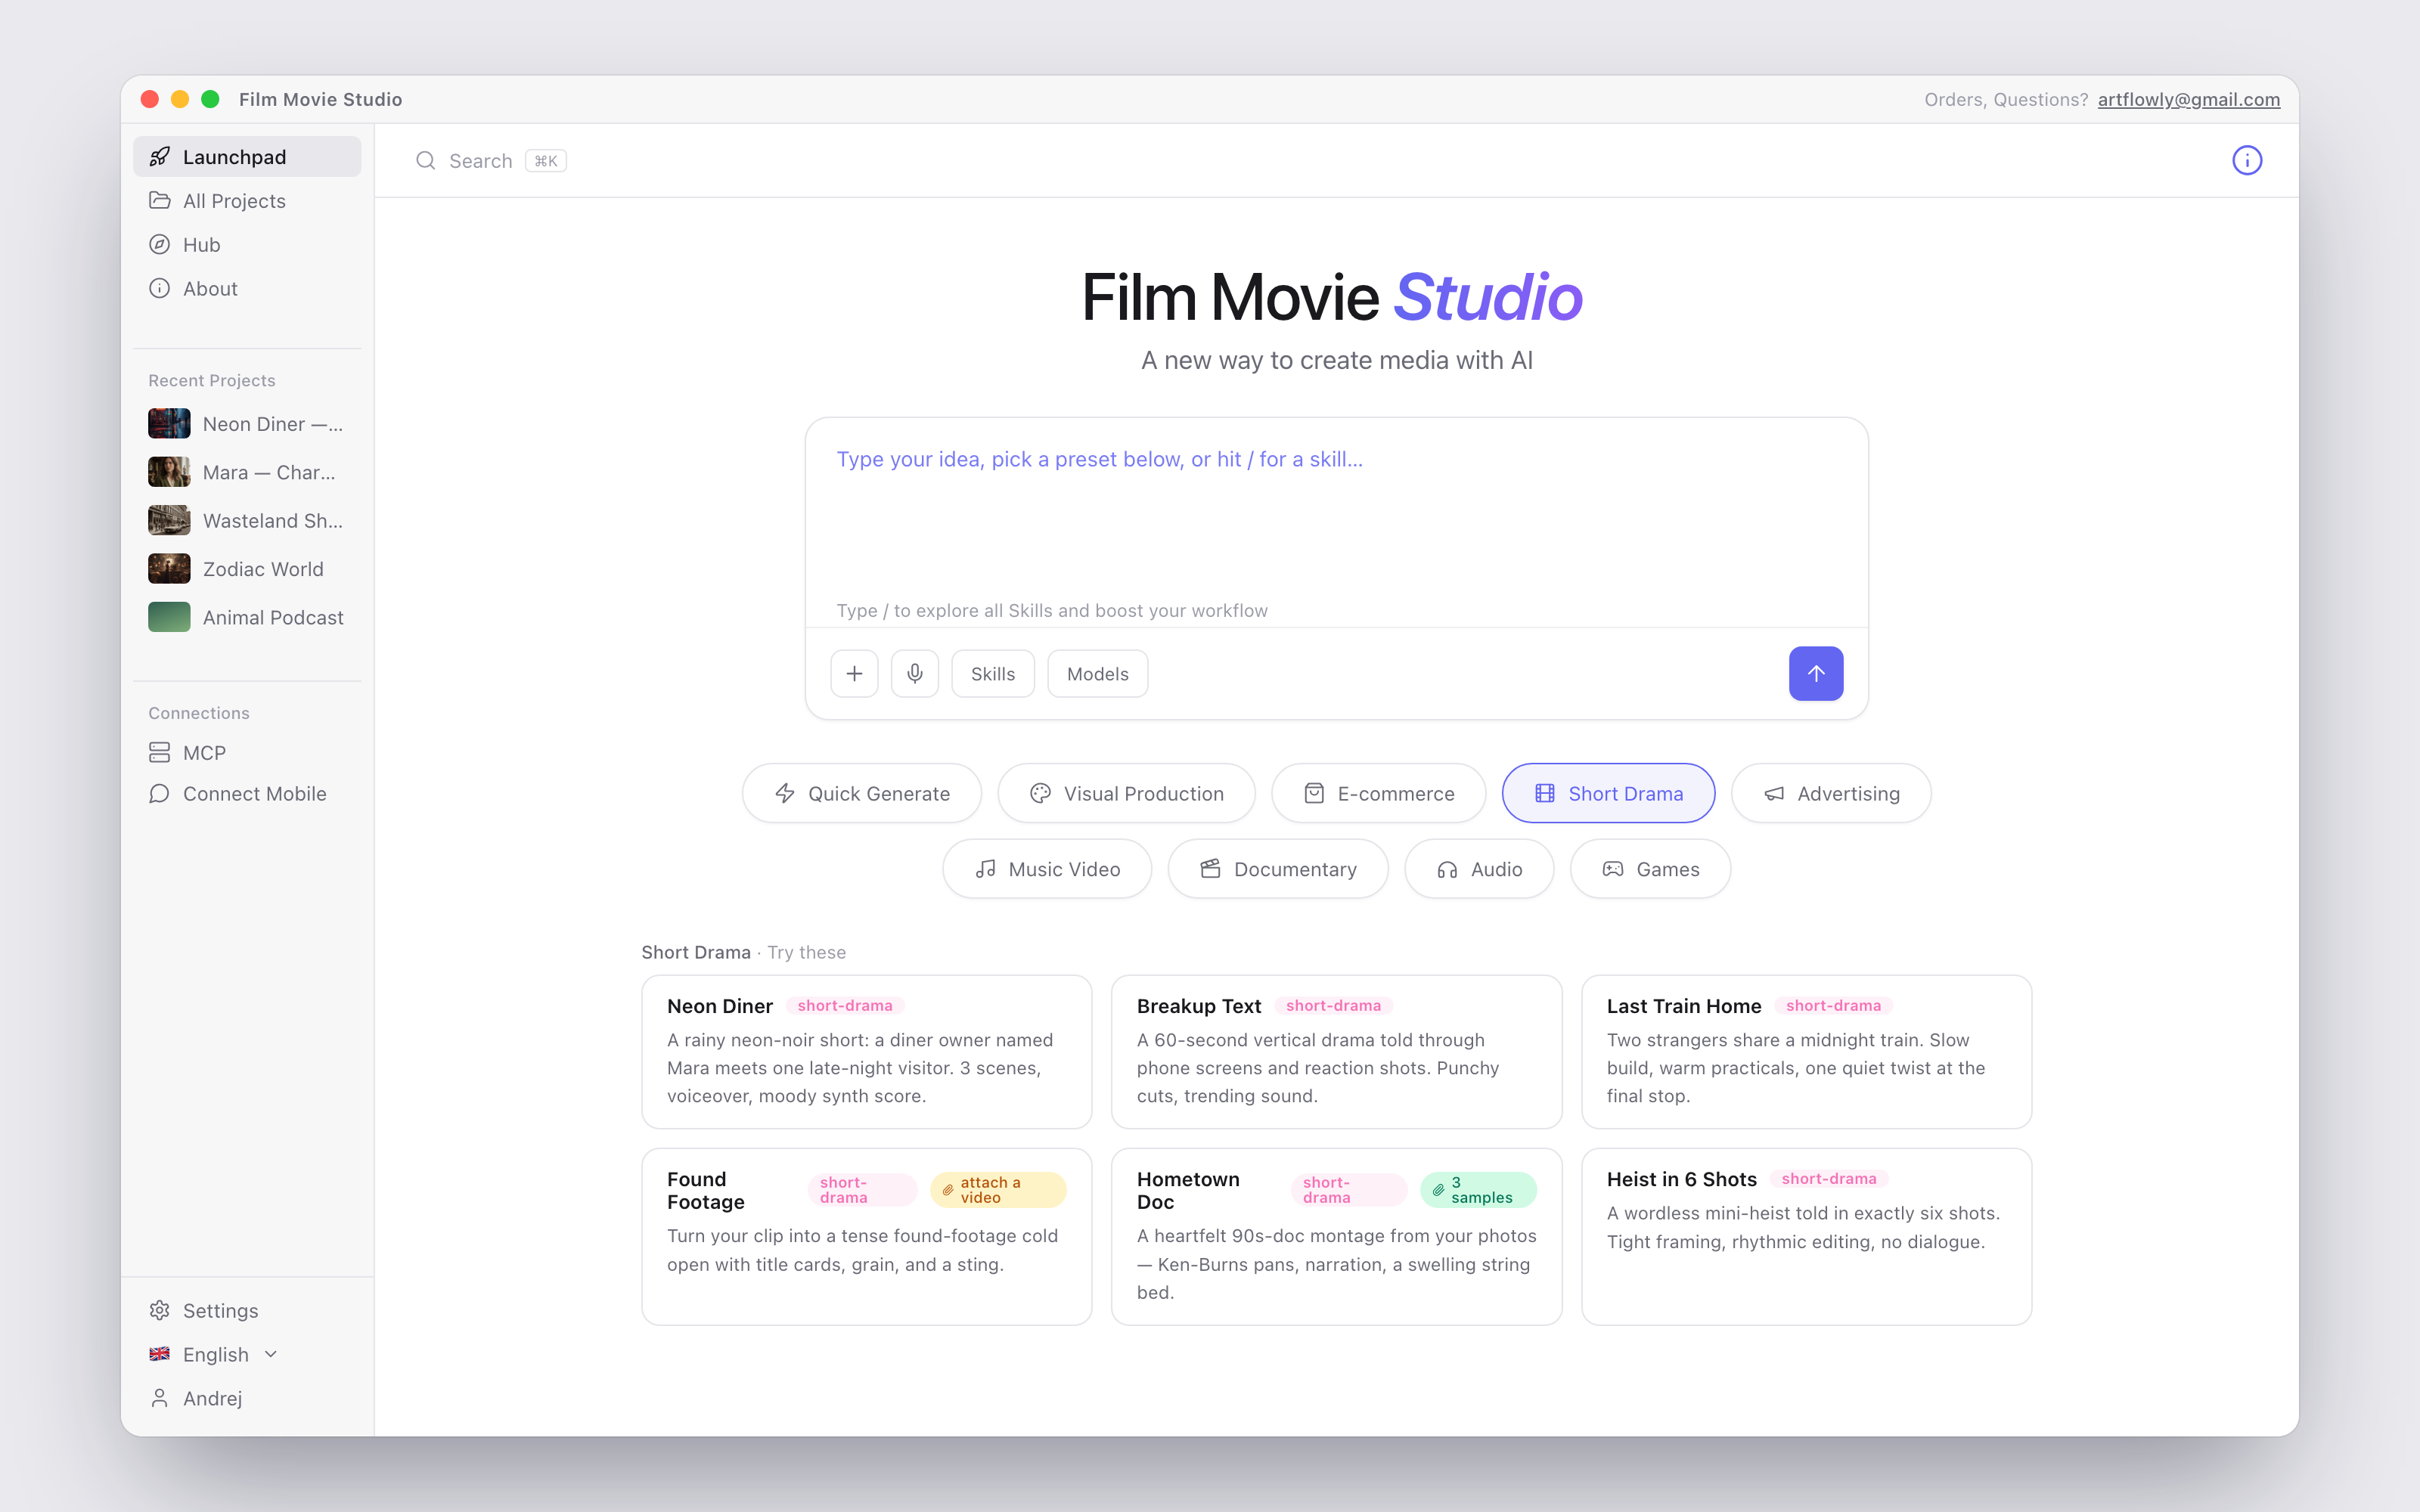
The categories are: Quick Generate, Visual Production, E-commerce, Short Drama, Advertising, Music Video, Documentary, Audio, Tools, Documents, Automation, Games, App Builder, Mobile App, Ad Creatives and Adobe Panel.
Presets that need input media ship with sample files that attach automatically, so every preset works with a single click — no hunting for a matching photo or track.
What happens when you submit
- A new project is created automatically — no dialog, no naming step. The app derives a title from your prompt instantly, then quietly asks the AI for a cleaner 2–5 word title a moment later.
- The project workspace opens with your prompt (and any attachments) already handed to the agent.
- The agent starts working immediately — results appear as cards on the canvas as they're generated. See Chat & the Agent for what happens next.
Tip: If a required provider isn't set up yet, a dialog appears instead of a broken project — see the "Set up a Script model" section in Getting Started.
All Projects
The All Projects page (in the sidebar) is your archive — every project you've ever created, as a grid of cards with cover thumbnails, searchable and paginated.
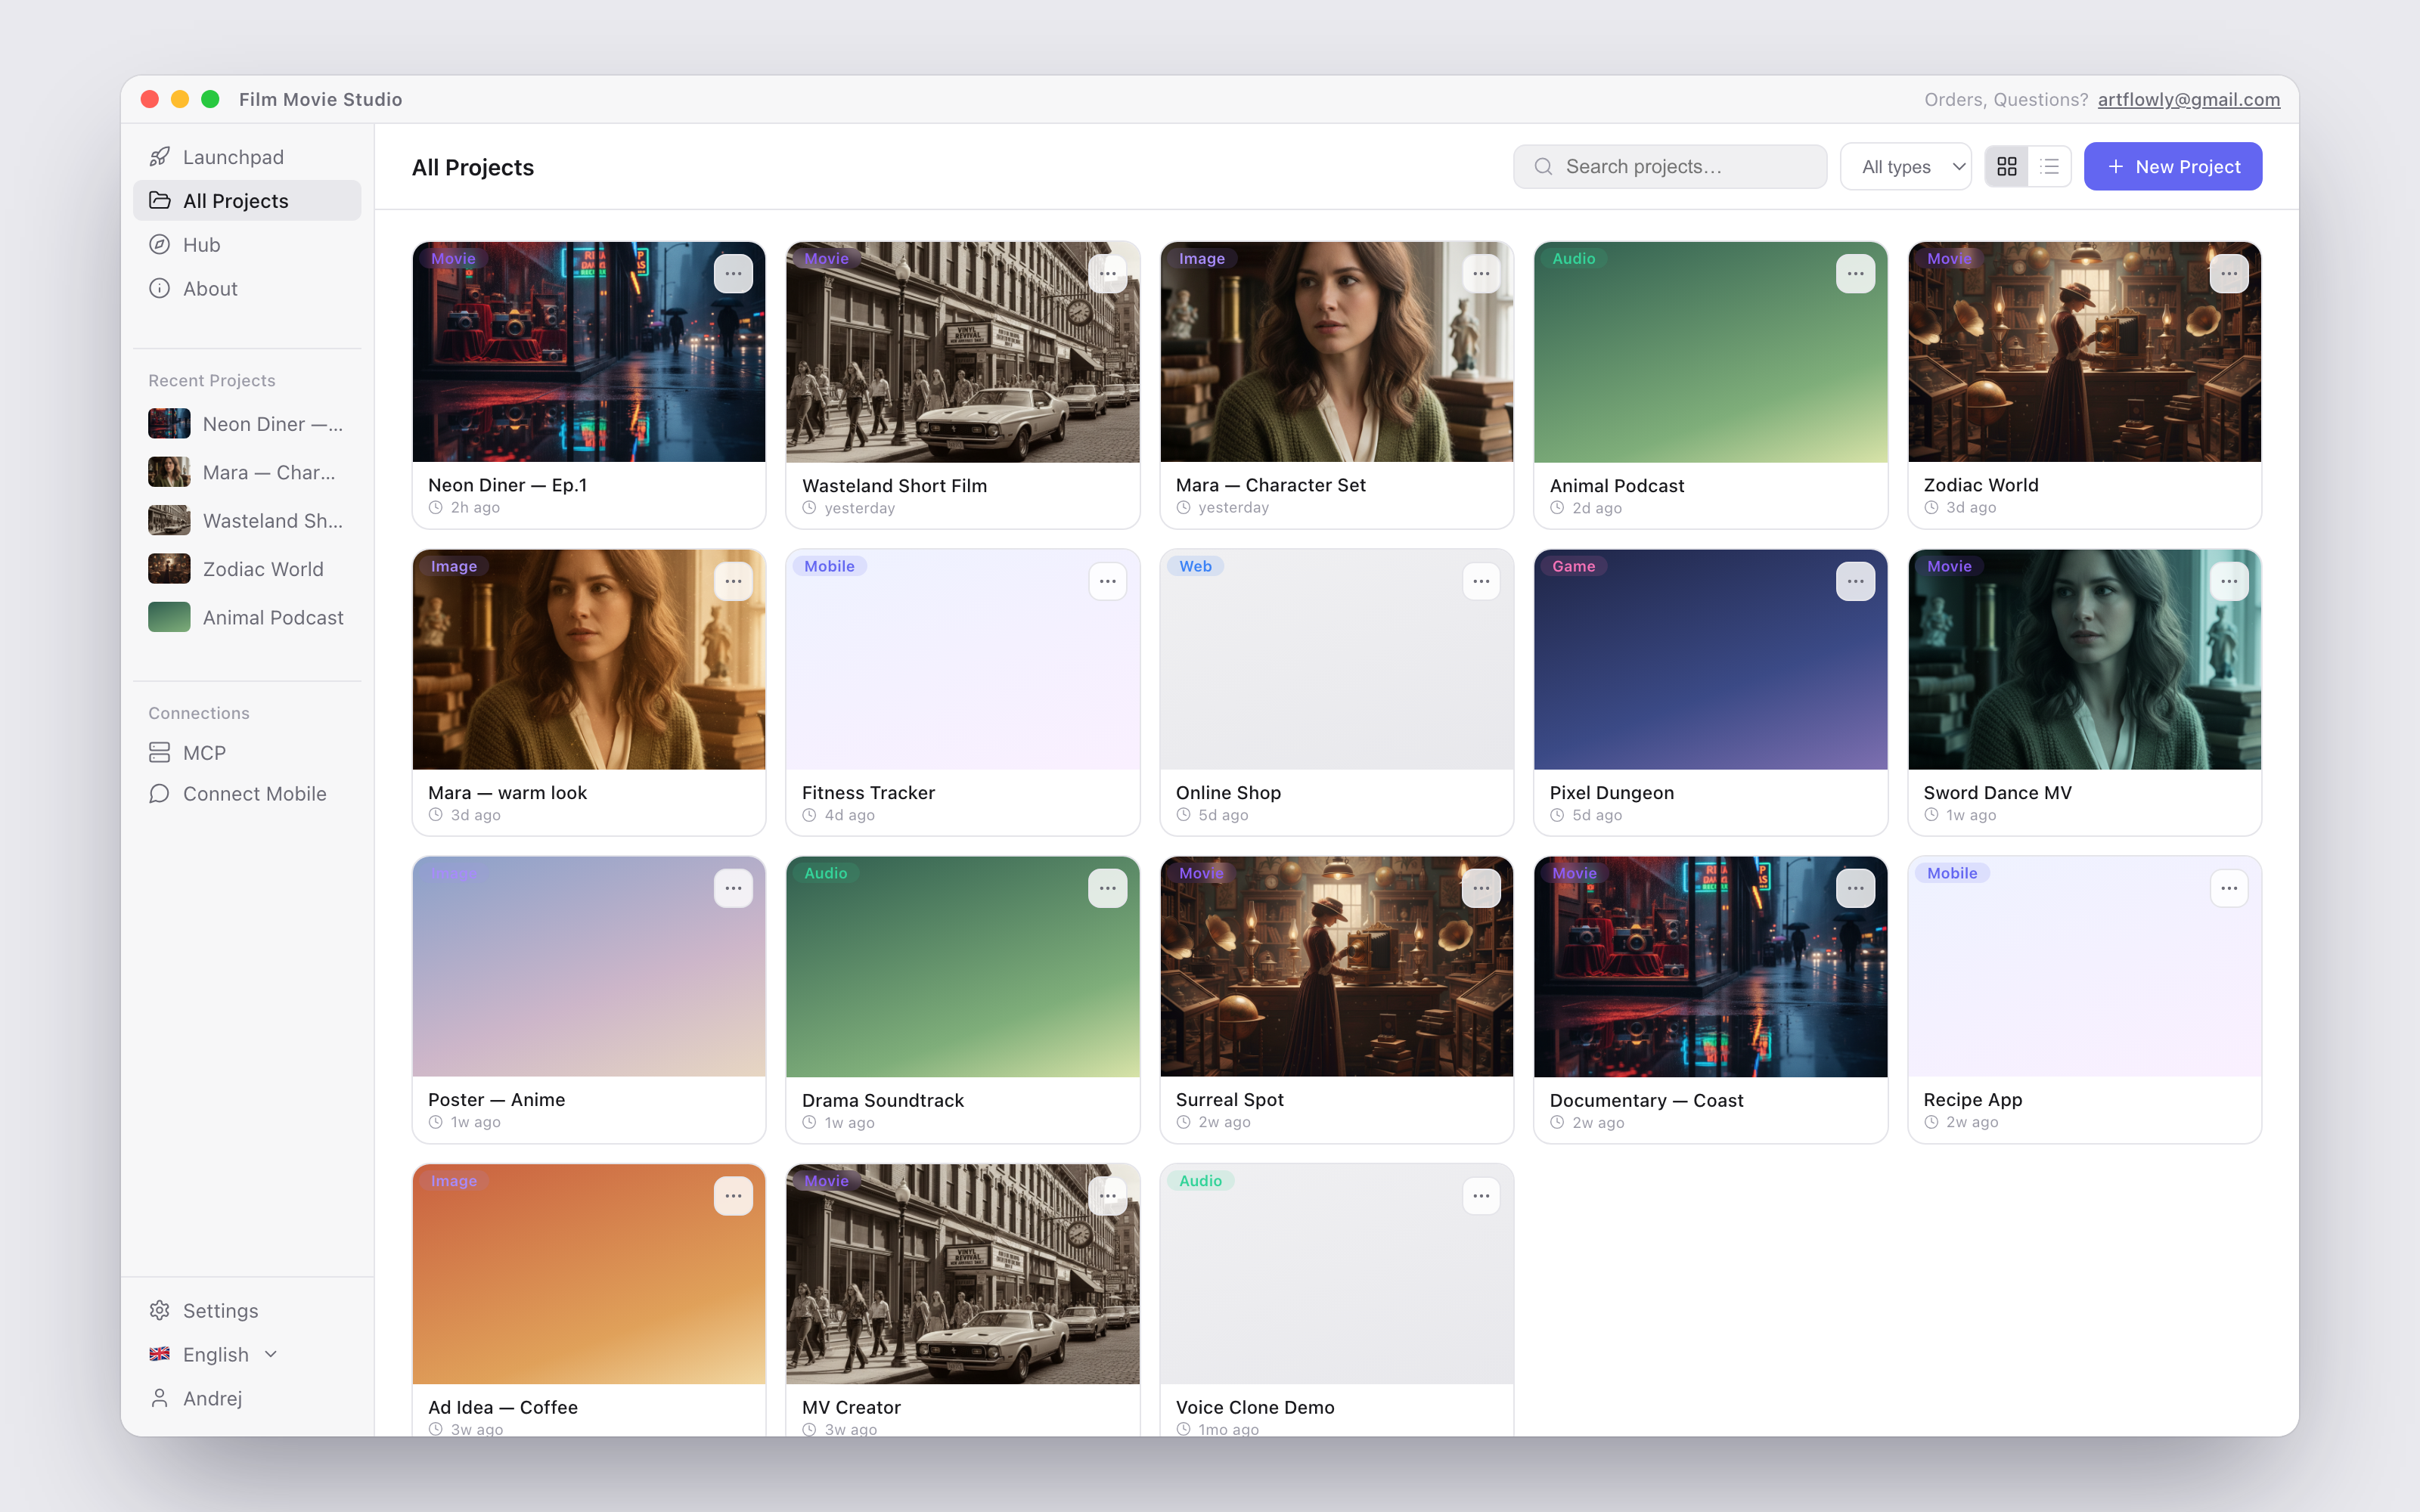
- Open a project by clicking its card. Hovering a card shows an enlarged preview of its cover.
- Search with the "Search projects…" field at the top.
- Views: switch between grid and list layout; choose how many projects show Per page, and page through with the arrows ("Showing 1–24 of 96", "Page 1 of 4").
- Rename / edit: open a card's menu and choose Edit Project — change the Name and Description, then Save Changes.
- Delete: choose Delete Project. You'll be asked to confirm — deleting removes all assets and chat history and cannot be undone.

The New Project modal
Prefer to start with an empty canvas instead of a prompt? Click New Project on the All Projects page.
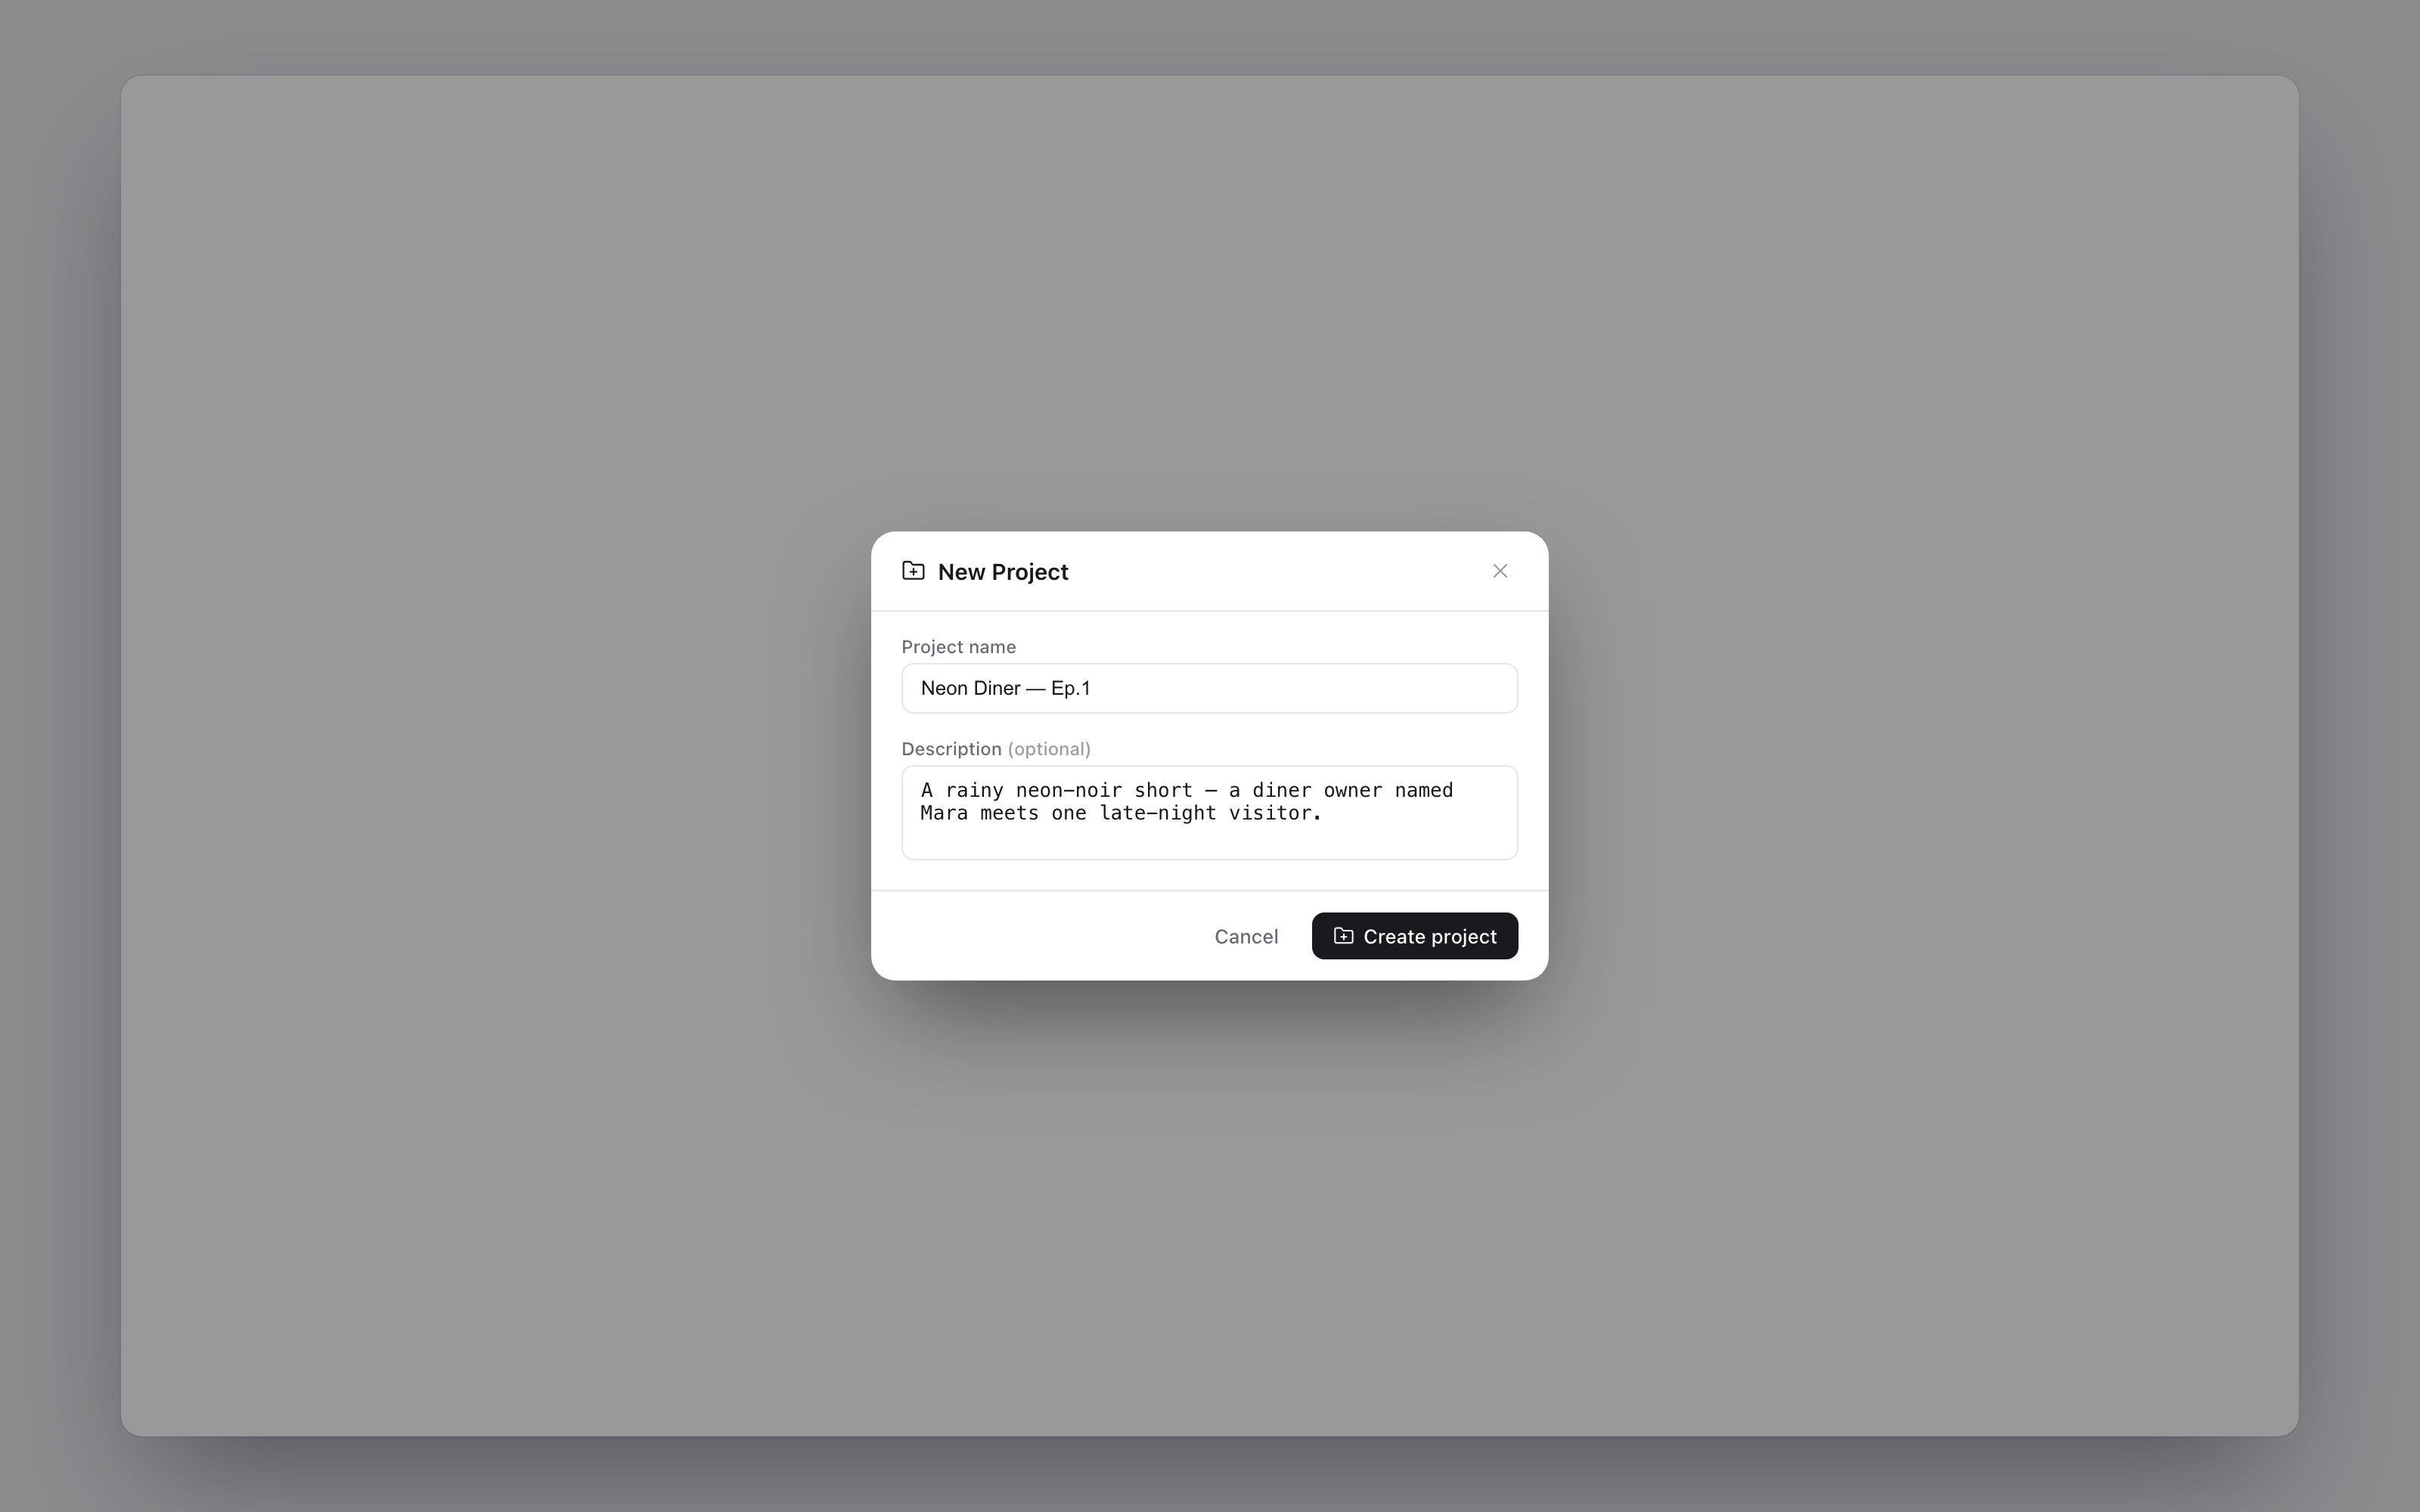
Give it a Project name (e.g. "Sunset Film"), optionally a Description, and click Create project. The empty workspace opens — you can add nodes by double-clicking the canvas or start chatting at any time.
Sidebar tour
The sidebar on the left is your permanent navigation:
| Item | What it does |
|---|---|
| Launchpad | The home screen described above |
| All Projects | The full project archive |
| Hub | Browse, install and manage Skills & Plugins — see Skills & the Hub |
| Assets | Your saved asset library, reusable across projects |
| Cast | The Cast library — reusable characters that keep the same face and voice in every project |
| About | Quickstart guide and app info |
| Recent Projects | Your 5 most recently updated projects, one click away |
| Connections → MCP | Let an external MCP client (Claude Desktop, Cursor) drive your open project |
| Connections → Connect Mobile | Drive the studio from your phone via a Telegram bot |
At the bottom: Settings, the language selector (click the flag to switch languages — no restart needed), and the account menu showing your name, with Account settings and Sign out. Signing out keeps your license activated — the sidebar shows your masked key so you can sign back in with one click.
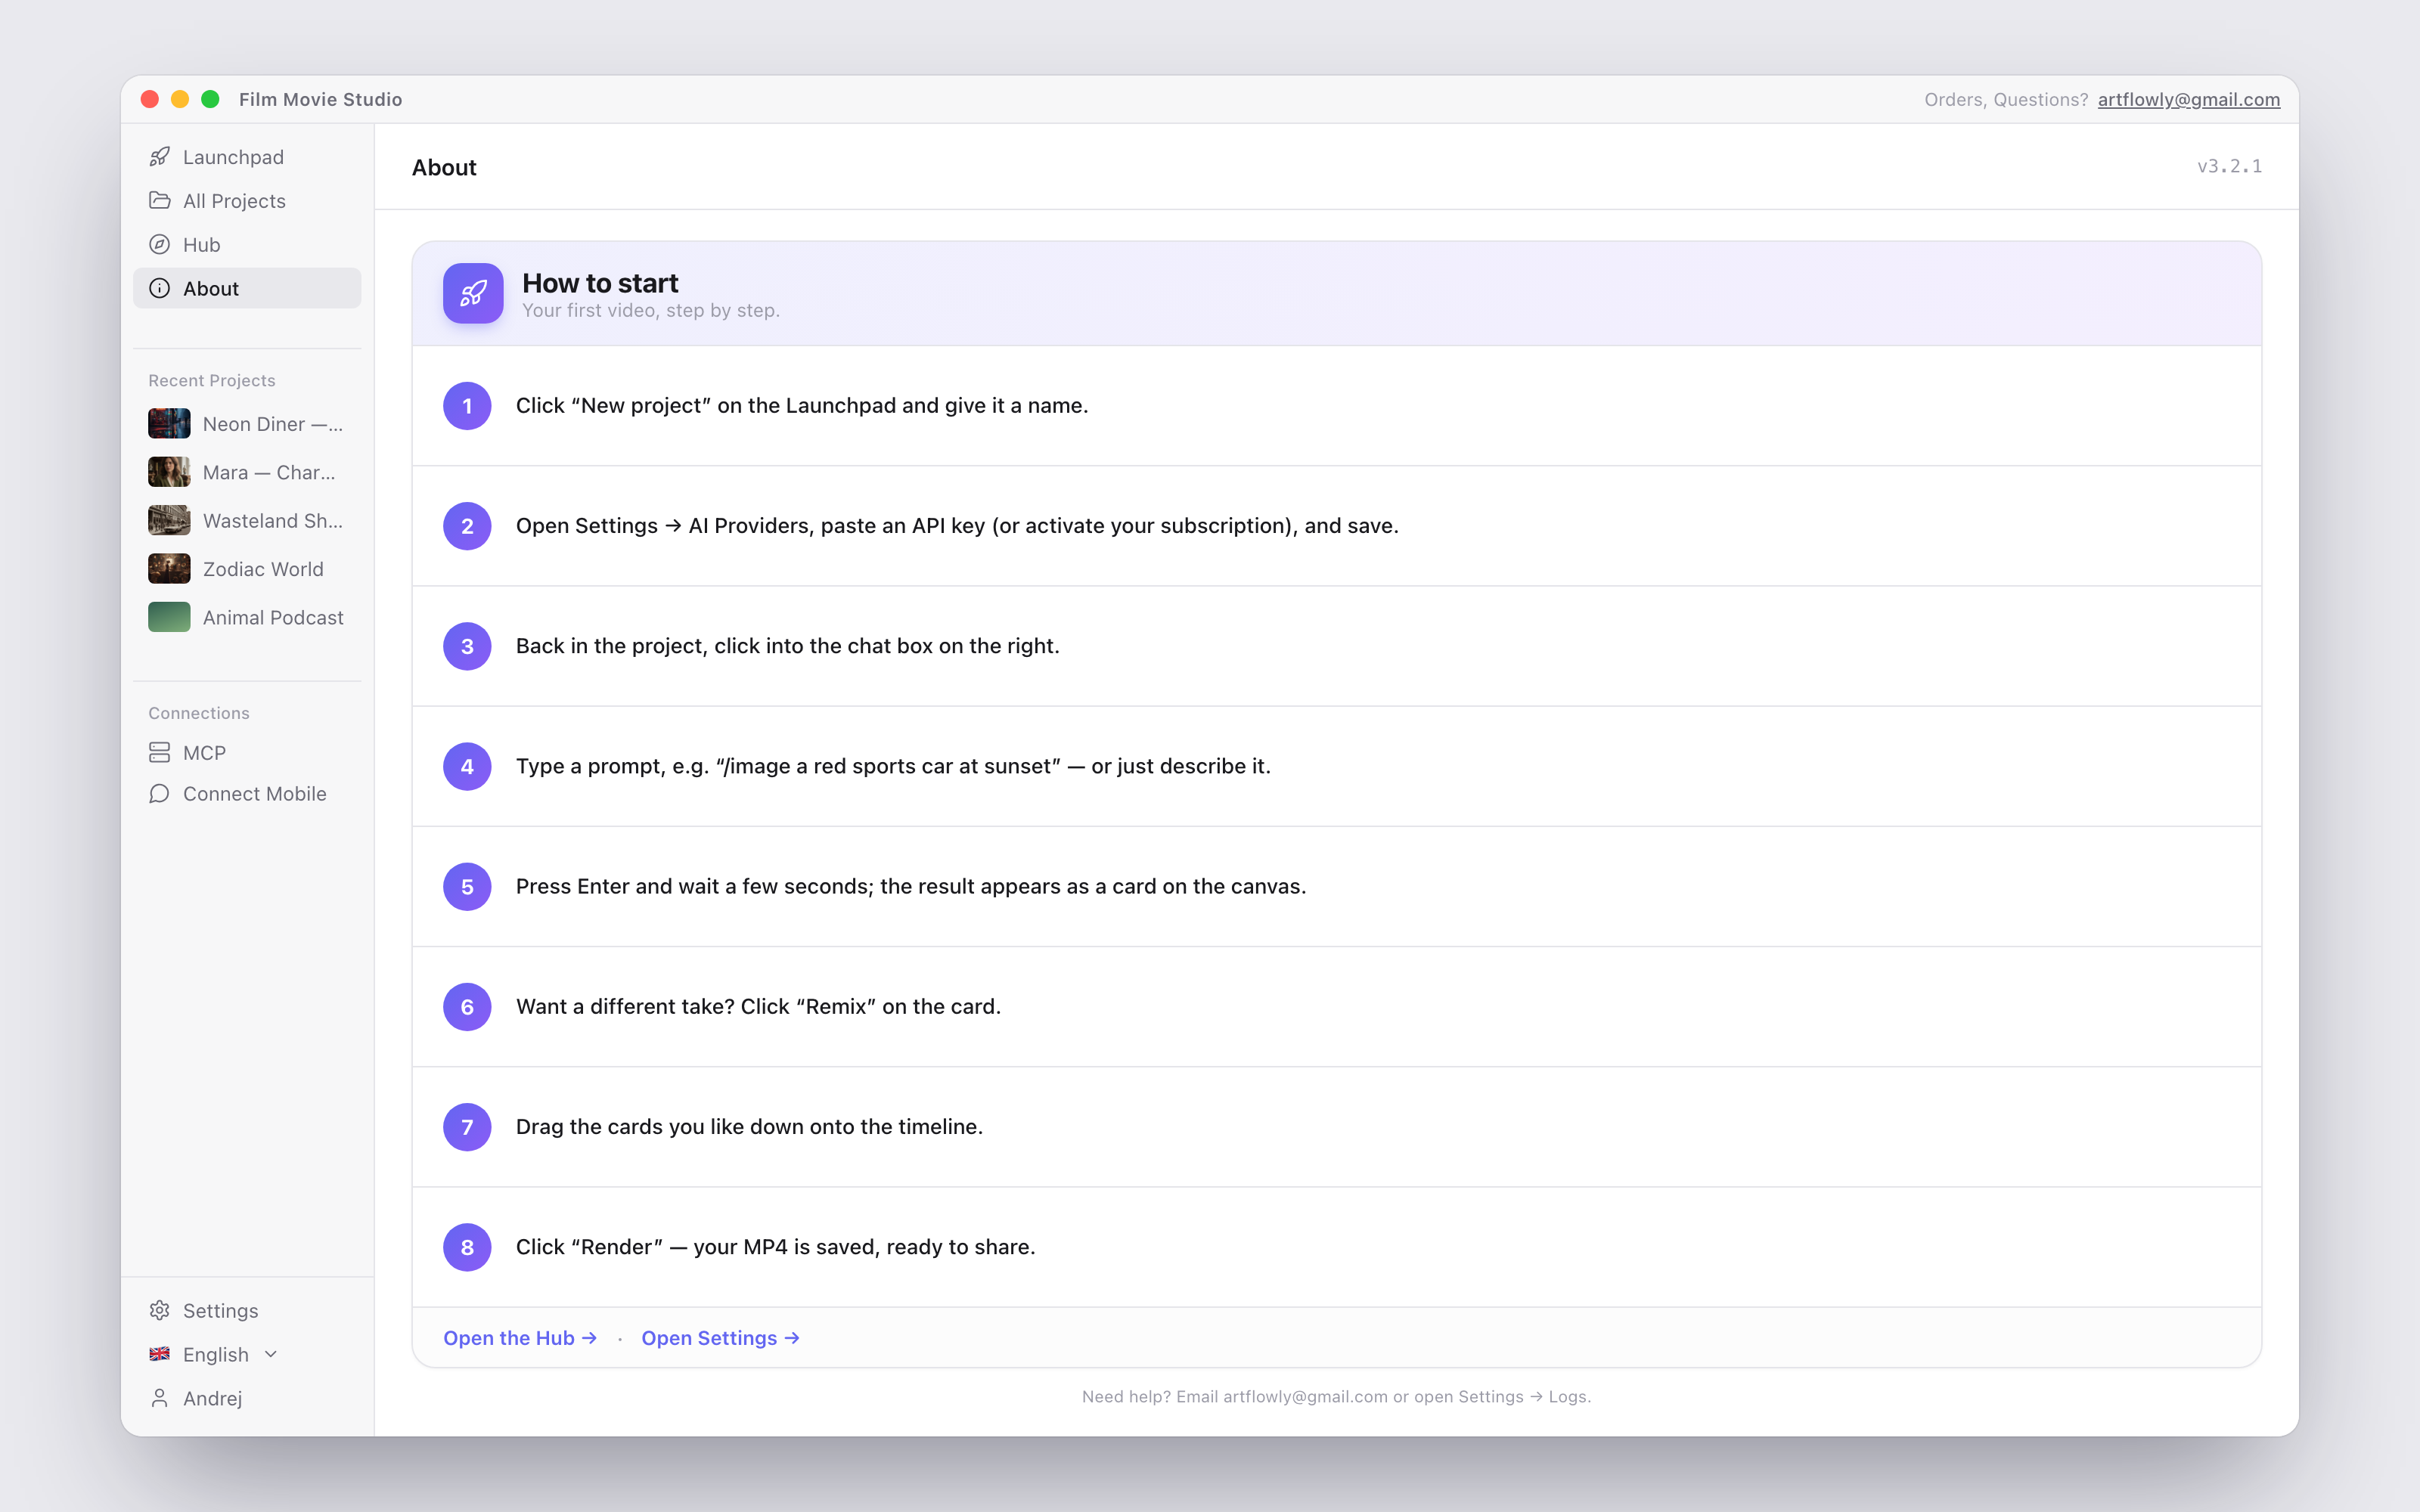
The About page
The About page is a compact "How to start" card — eight concrete steps from creating a project to rendering an MP4 — with quick links to open the Hub and Settings. The header shows your exact app version (e.g. v3.3.5), handy when checking whether a newer release is available on filmotvor.ai/studio or when contacting support.
Tip: Forgot where something lives? The About page and the Launchpad's Guide tour are the two fastest refreshers — and you can always ask the chat.