The Timeline Editor is where your generated clips become a finished film. Arrange video, dialogue, sound effects, music and subtitles across tracks, fine-tune the cuts, then compose everything into a real MP4 — all inside the app, no external editor required.
Opening the timeline
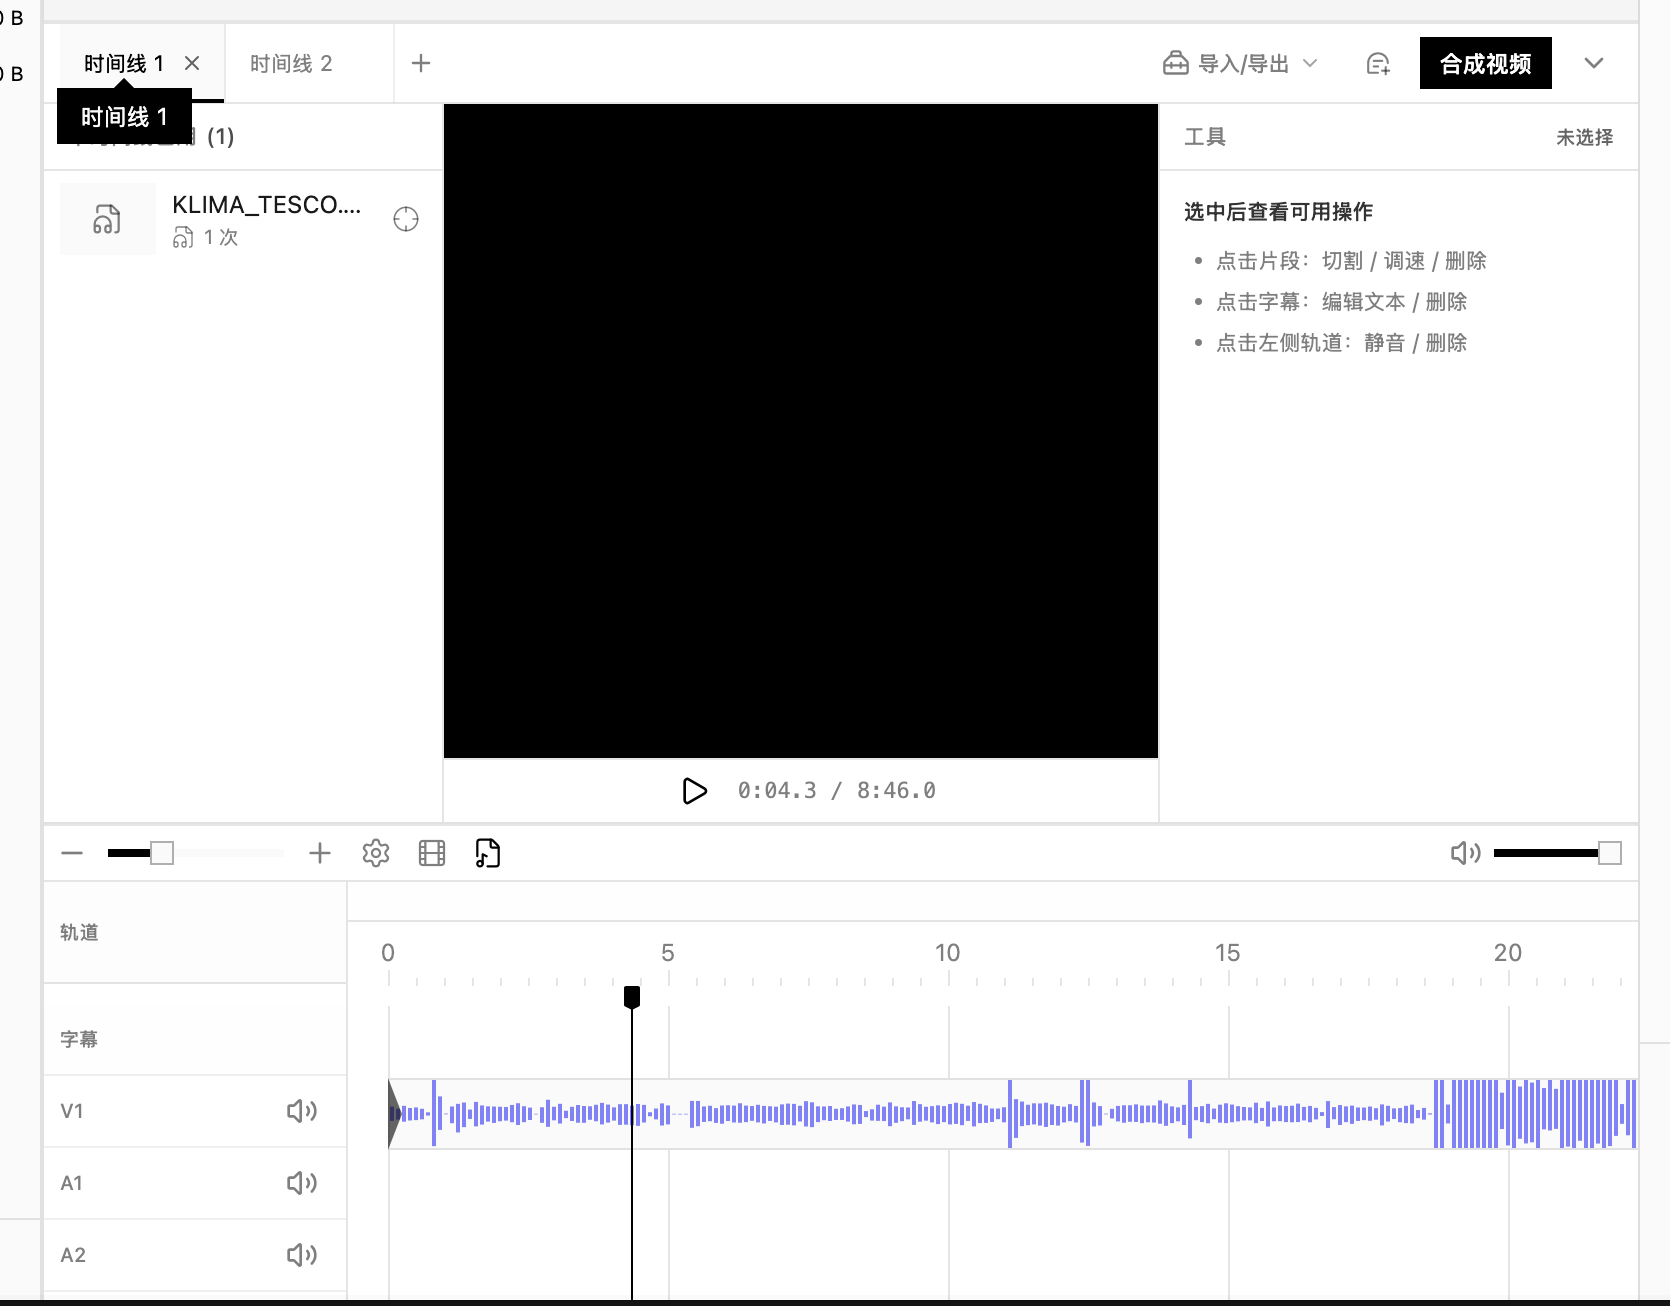
Every project workspace has a floating Timeline pill in the bottom-left corner of the canvas. The number in parentheses — for example Timeline (12) — shows how many clips are already on the active timeline, and the pill lights up in the accent color as soon as there is content ready to render.
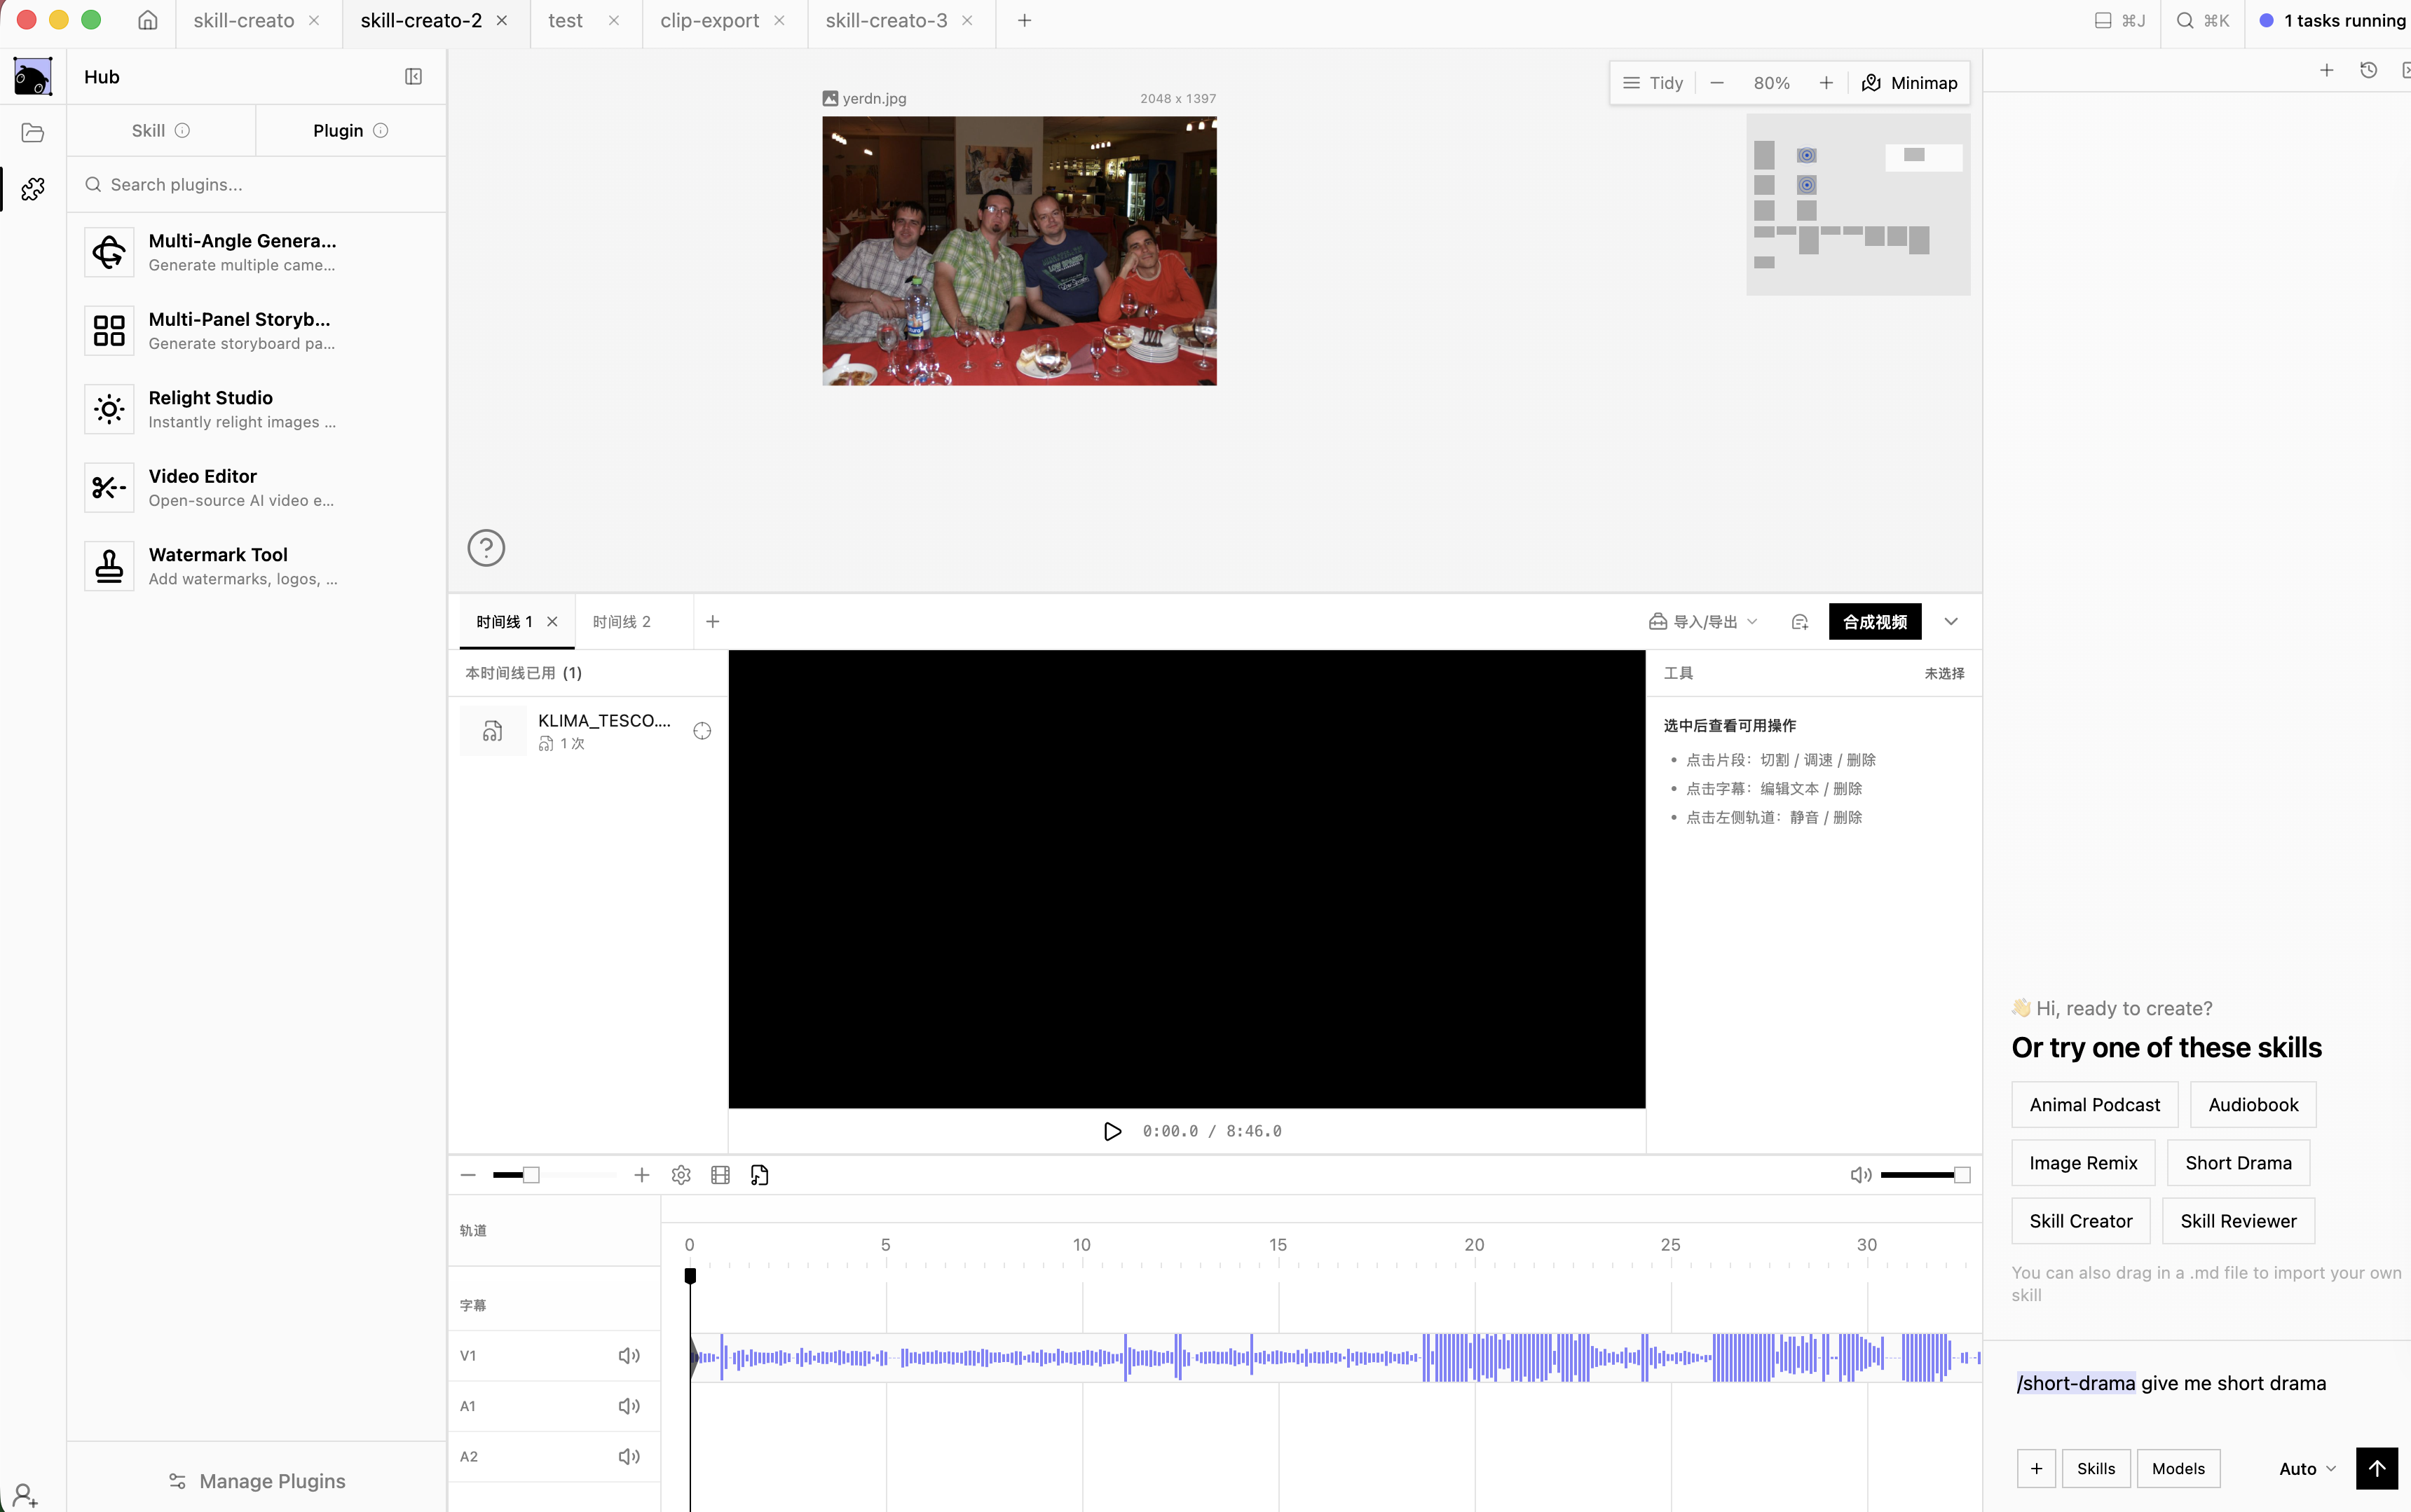
Click the pill and the editor opens inside the workspace:
Need more room? Use the fullscreen button in the top-right of the editor (Open timeline fullscreen) — press Esc or click the button again to exit.
Multiple timelines
One project can hold several cuts — a full film, a trailer, a vertical short. The tabs across the top of the editor are your timelines:
- Click + (New timeline) to add another timeline (they are named Timeline 1, Timeline 2, …).
- Click a tab to switch to that timeline.
- Click the small × on a tab to delete it (available whenever you have more than one).
Each timeline keeps its own clips, subtitle style and playhead position, and everything is saved automatically.
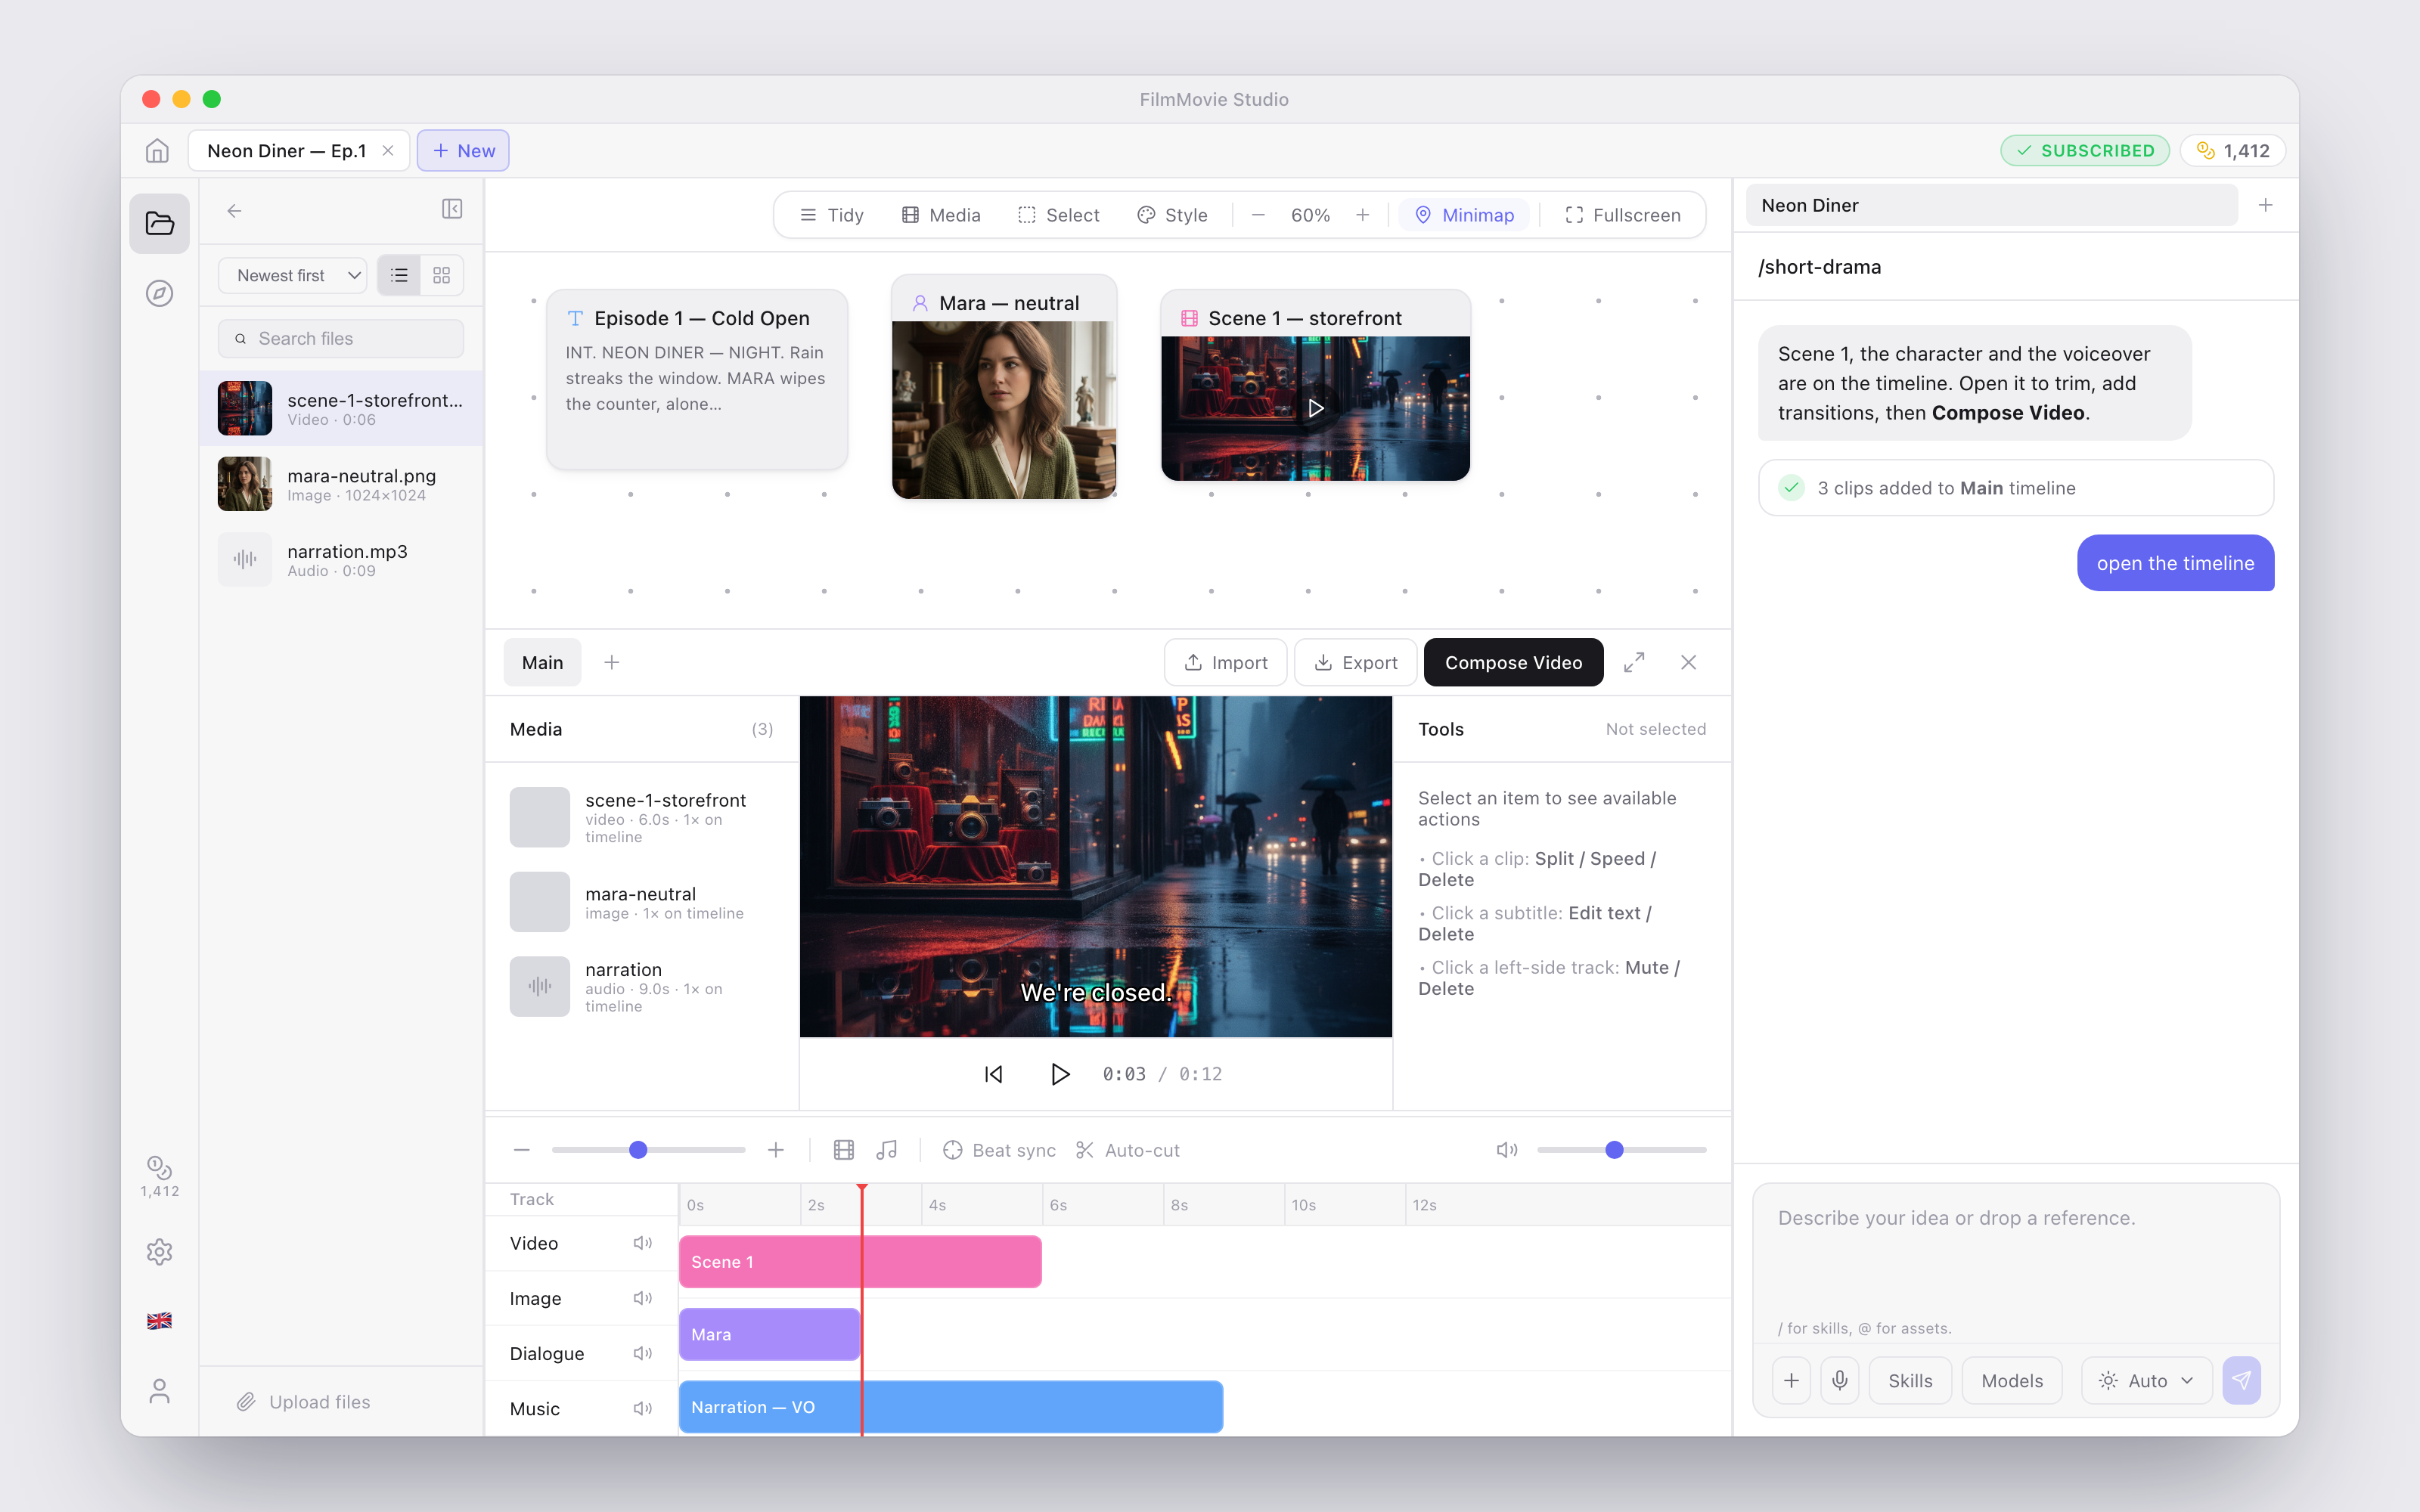
Adding content
There are three ways to get media onto the timeline:
- From a canvas card — hover any video, image or audio card on the canvas and click Add to timeline in its toolbar. See Canvas & Cards.
- From the Media panel — the left column of the timeline editor lists every asset in the project (grouped by scene). Hover an item and click the crosshair icon (Add to timeline).
- Import → Media file… — bring in any file from your computer; it becomes a project asset and lands on the timeline in one step.
Clips are routed to the right track automatically:
| Content | Track |
|---|---|
| Video | V1 |
| Image (stills) | V2 |
| Voiceover / dialogue audio | Dialogue |
| Sound effects | SFX |
| Music | Music |
| Subtitles | Subtitle |
New clips snap to the end of their track, and you can add extra video or audio tracks with the film and note icons in the track toolbar.
Playback & view controls
| Control | What it does |
|---|---|
| Play / Pause (▶ / ⏸) | Plays the timeline in the preview, with all unmuted audio tracks mixed live |
| Jump to start (⏮) | Moves the playhead back to 0:00 |
| Time ruler | Click or drag anywhere on the ruler (or an empty lane) to scrub the playhead |
| − / + and zoom slider | Zoom the track lanes out/in |
| Volume slider (right end of the track toolbar) | Master preview volume |
| Open timeline fullscreen / Exit fullscreen (Esc) | Toggles fullscreen editing |
| Drag the divider above the tracks | Resizes the tracks panel vs. the preview |
The preview also shows your subtitles live, styled exactly as they will be burned into the final video.
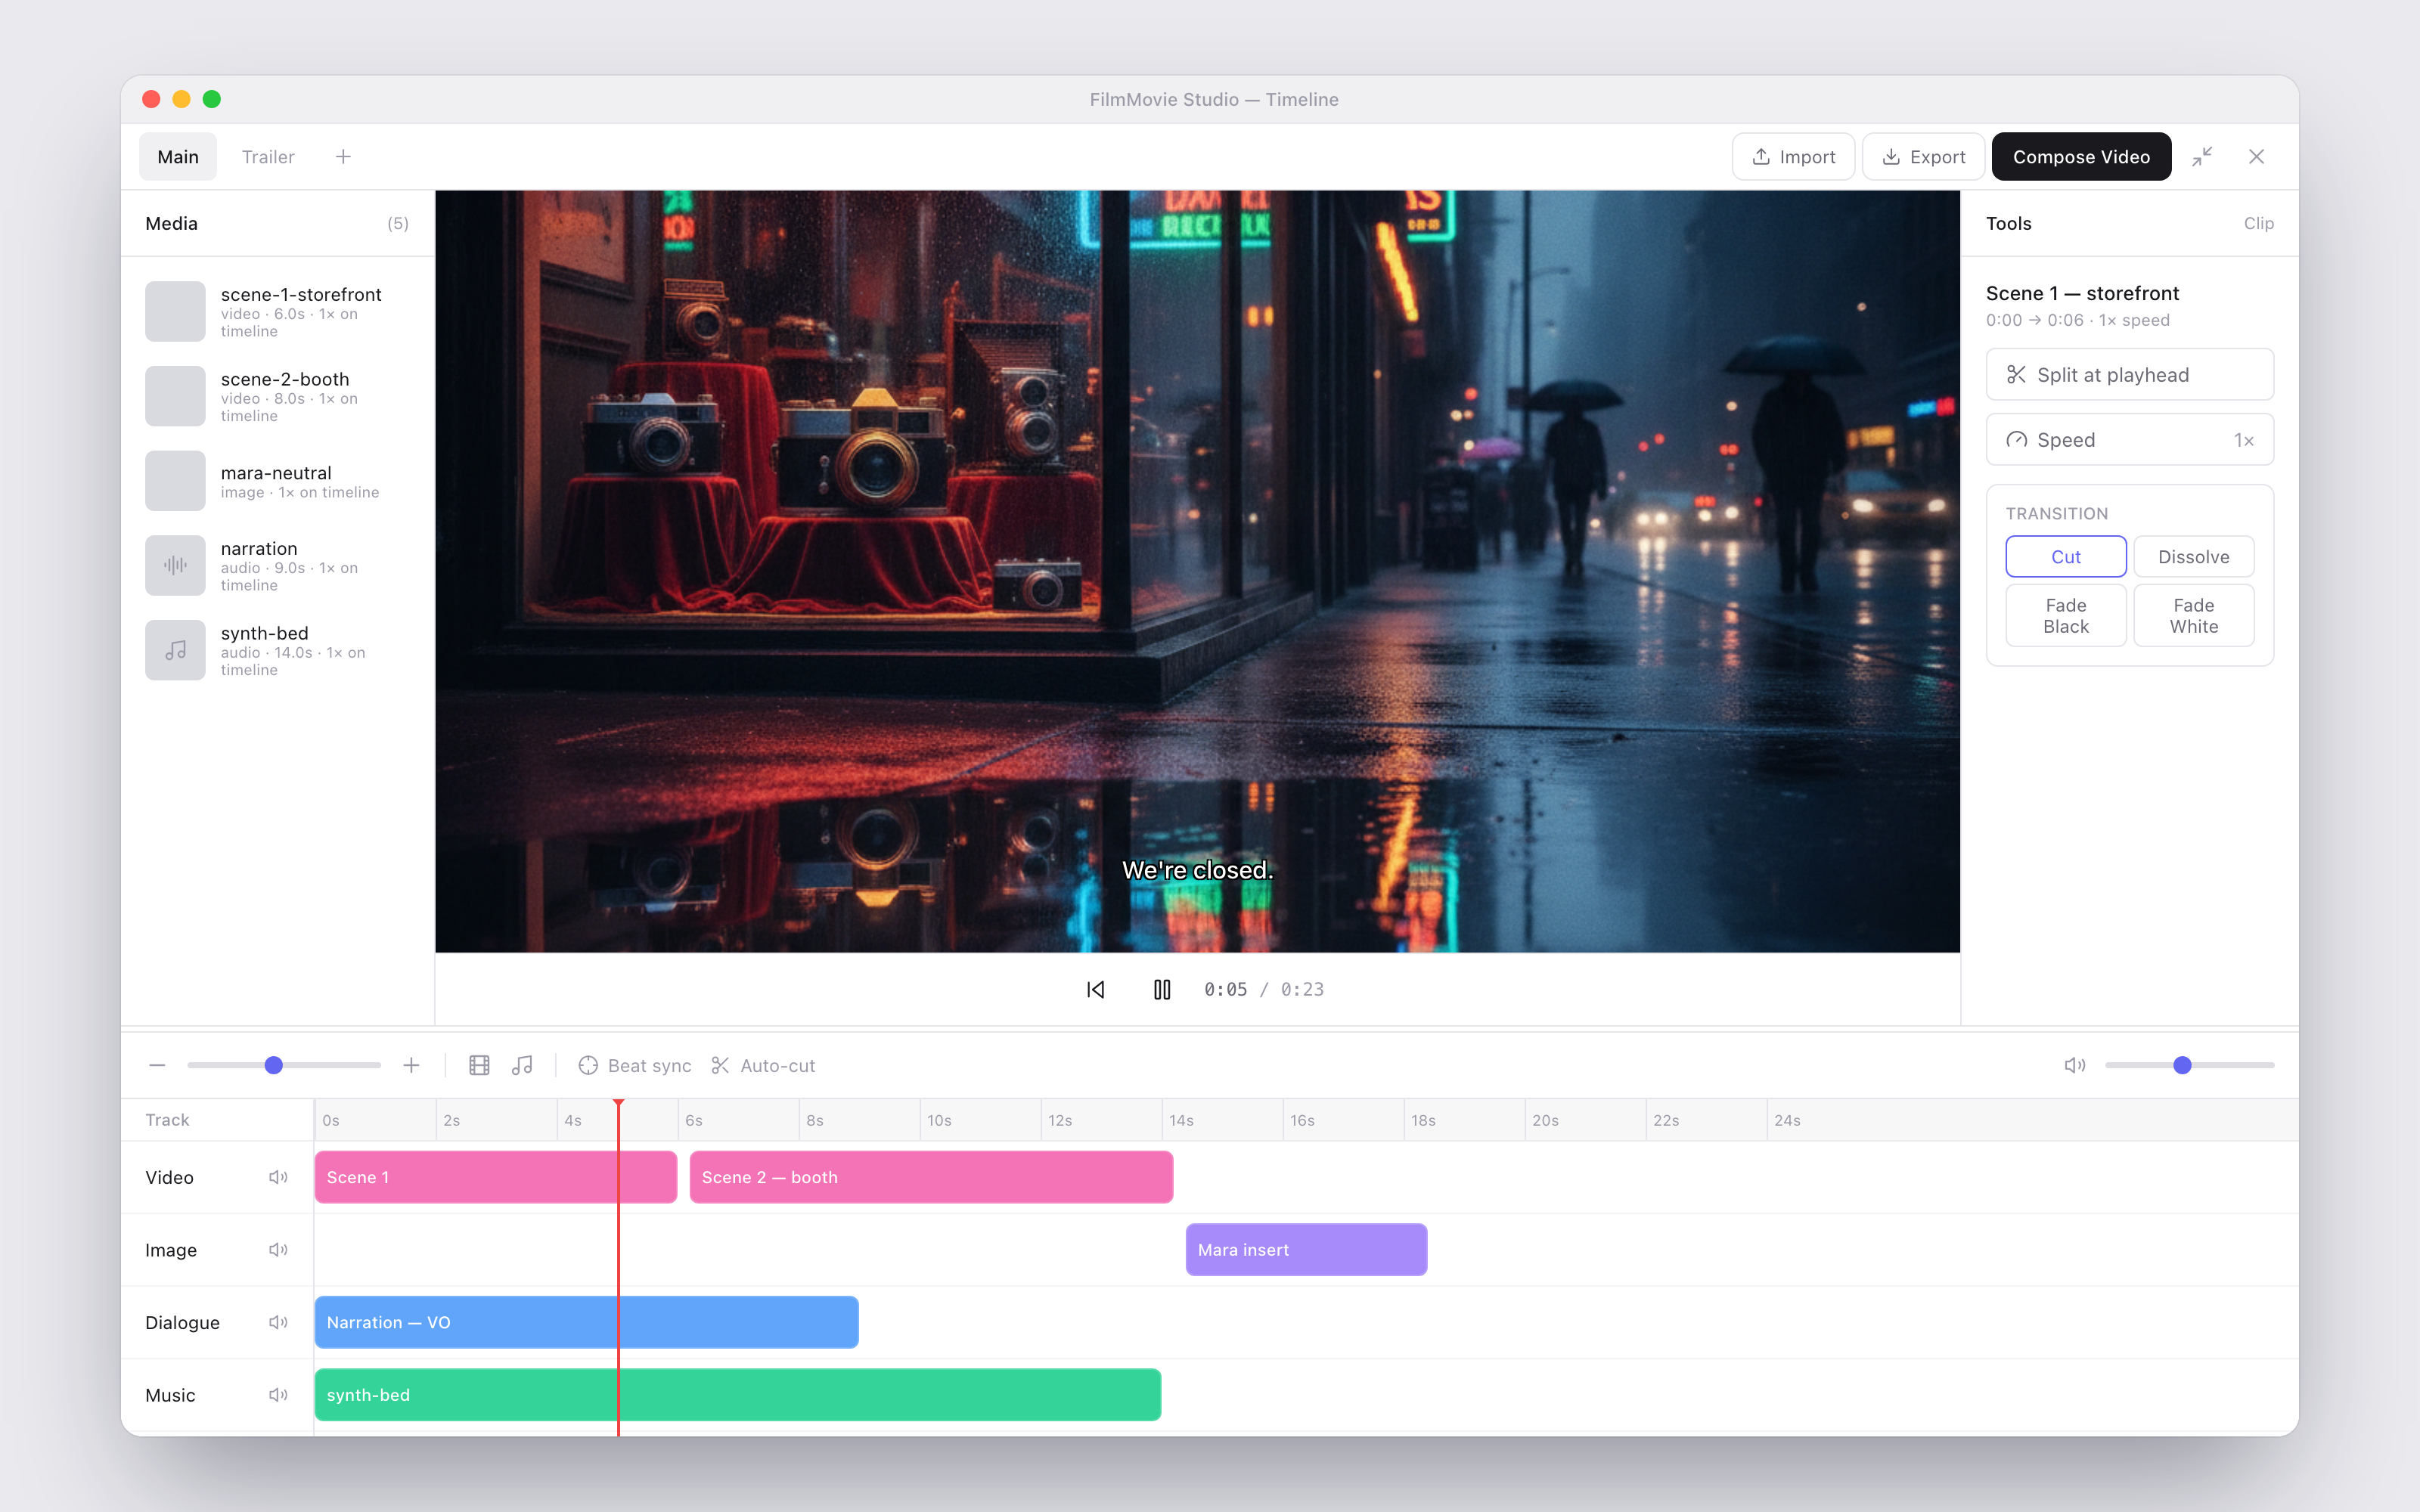
Editing clips
Click a clip to select it — the Tools panel on the right shows everything you can do:
- Move — drag the body of a clip left/right along its track.
- Trim — drag the left or right edge of a clip to shorten or extend it.
- Split at playhead — park the playhead inside the clip and click to cut it in two.
- Speed — cycles the clip through 0.5× → 1× → 1.5× → 2×. Audio pitch-and-pace follows in the preview and the render.
- Use asset duration — snaps the clip back to the media file's real length.
- Delete clip — removes the clip (the asset itself stays in the project).
Transitions
Select a video or image clip and pick a Transition to next clip:
| Transition | Effect |
|---|---|
| Cut | Hard cut (no transition) |
| Dissolve | Crossfade into the next clip |
| Black | Fade to black between clips |
| Fade White | Fade to white between clips |
A slider sets the transition length from 0.2s to 2.0s (default 0.3s). Active transitions appear as a small marker sitting on the seam between the two clips — click it any time to edit.
Subtitles
The Subtitle track carries text that gets burned into the rendered video.
- Add subtitle — drops a new subtitle at the playhead; edit its text in the Tools panel (changes are saved automatically).
- Import → Subtitles (.srt)… — load an existing SRT or VTT file. Subtitle files already in the project show up under Project subtitles in the same menu.
- Subtitles from voice — transcribes every Dialogue clip (and video clips containing speech) and lays the resulting cues onto the Subtitle track at the correct times. This replaces any existing subtitles.
Subtitle style
Select the Subtitle track or any subtitle clip to open Subtitle style (burned in):
- Quick presets: Classic, Cinema (yellow), Minimal (no outline), Banner (large, top of screen).
- Size slider (16–96), Color picker, Outline on/off.
- Position: Top, Middle or Bottom.
The style applies to all subtitles on that timeline, and the preview overlay updates instantly.
Audio tools
- Align voice (track toolbar) — snaps every dialogue clip to its matching video clip (first voice line → first shot, and so on).
- Align to video (on a selected dialogue clip) — snaps just that voice clip's start to its video clip.
- Fit video to voice (on a selected dialogue clip) — resizes the paired video clip to the voice line's length; later clips on the track shift to follow.
- Cut to beat — detects the beats in your Music track and re-times every video/image cut to land on a beat. Add a music clip first; the button reports how many beats it found.
- Track volume — select a Dialogue, SFX or Music track to set its level from 0–200%.
- Duck under dialogue — on the Music track: automatically lowers the music whenever a dialogue clip is playing, both in the preview and the final render.
- Mute — every track has a speaker icon to mute/unmute it.
Export & render
The top-right of the editor has everything you need to get your work out:
- Compose Video — renders the active timeline into a real MP4. You pick where to save the file; the app then composes all tracks (cuts, speeds, transitions, audio mix, music ducking and burned-in subtitles included) and shows the finished duration and file size when done.
- Export → Bundle for editors (CapCut…) — writes a folder with your ordered media files, an SRT and a manifest, ready to drop into an external editor.
- Export → Subtitles (.srt)… — saves just the subtitle track as an SRT file.
- Export → Project JSON… — saves the project data as a JSON file.
You can also render from chat: just ask the assistant to "render the timeline" and it composes the video for you and puts the result on the canvas. See Chat & the Agent.
Tip: You rarely have to build a timeline by hand. Skills like
/promo-videoand/beat-sync-editorgenerate the media and assemble the timeline for you — then you just polish and press Compose Video. Browse them all in the Skills Reference.